Zebra GK420t desktop thermal printer utilizes the best ribbon-loading thermal transfer technology to create good-quality, durable label images as well as receipt prints for indoor short-term uses. GK420t is well-suited to any industry and provides the best value for your money at 203 dots per inch print density with speeds up to 5 inches per second. It supports both the EPL and ZPL Zebra printer programming languages and a wide variety of feature options on a user-friendly interface. Zebra GK420t Setup enables combining this trusted printing technology with fast print speeds and network manageability. With their easy-to-use design and Zebra GK420t Wireless Setup connectivity, Zebra’s advanced desktop printer enables you to improve operational efficiencies to a great extent.
Table of Contents
ToggleVarious Steps To Setup Zebra GK420t Printer
- Attaching Power
- Loading Roll Media
- Loading Transfer Ribbon
- Printing a Test Printer Configuration page
- Pre-install Windows Printer Drivers
- Connecting your Printer to a Computer
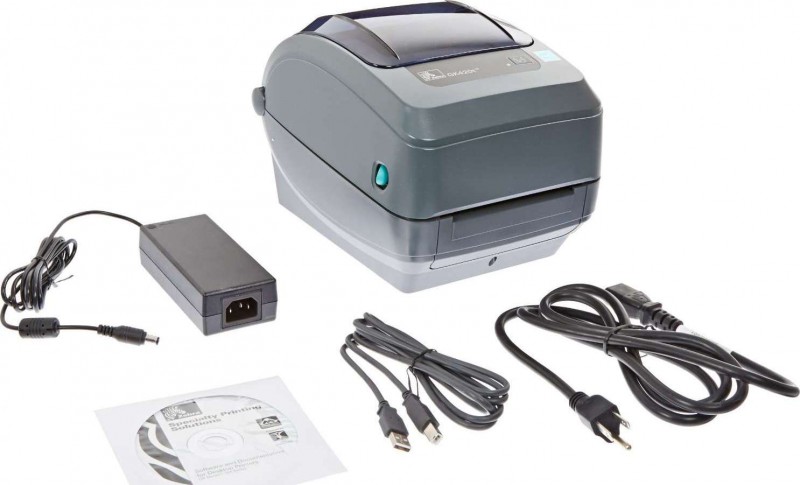
Attaching Power
1. At the very outset, ensure that the Zebra GK420t power switch is in the off position. 2. Now, begin the Zebra GK420t Setup by inserting the AC power cord into the power supply. 3. As for the other end of the cord, plug it into an appropriate AC electrical outlet. An active power light will indicate the on position if the power supply is on. 4. Next, insert the power connector into the GK420t printer’s power receiver to ensure a further step in the Zebra GK420t Wireless Setup.
Loading Roll Media
For the next step in the Zebra GK420t Setup, you require to load the roll media in its proper place. When you load the media, you must ensure to put the roll on the media hangers. Please ensure that you are using the correct media for the kind of printing you need with your GK420t printer.
Preparing Roll Media
Before stating to load, remove the outside length of the media. During storage, shipment or handling there is the possibility of the roll becoming dusty or dirty. Taking away of the outside length of the media prevents taking along dirty or adhesive media on to the print head and platen. Even when your roll media is wound inside or outside, you need to load it into your printer the same way for Zebra GK420t Setup.
Putting the Roll in the Media Compartment
1. Now open the Zebra GK420t printer. You must take care to draw the release latch levers in the direction of the front of the printer. 2. Next, open the holders of the media roll and pull the media guides open with your hand. Place the media roll onto the roll holders and set the guides free. Rotate the media roll in such a manner that its printing area faces up as it passes over the drive roller. This is important step with Zebra GK420t Wireless Setup. 3. Furthermore, pull the media in such a way that it stretches out of the front of the Zebra GK420t printer. Check if the roll rotates freely. It is essential that the roll must not sit at the bottom of the media area. Ensure that the media printing surface is facing up for Zebra GK420t Setup to happen properly. 4. Now, place the media below both the media guides. 5. Close the Zebra GK420t printer. Press down until the cover closes with a snap.
Loading The Transfer Ribbon
Transfer ribbons are created in various colours and varieties and to match the needs of your application. The original Zebra transfer ribbons are particularly created for the needs of your printer and the Zebra brand media. Using non-Zebra ribbons or media that are not compatible for use with your Zebra GK420t printer may damage the print head or the printer itself. Before going ahead, you need to prepare the ribbon by pulling off its wrapping as well as its adhesive strip.
- Open the printer and put a new ribbon roll on the Zebra GK420t printer’s ribbon supply spindles. Now, you must rotate the roll till the notches align themselves and lock into the left of the supply hub. This is another step for the Zebra GK420t Setup.
- Now, on the Zebra printer’s take-up spindles, you need to place an empty ribbon core and rotate the same until the notches align themselves and lock at the left side of the take-up hub.
- Next, pull the ribbon’s leader off the roll and fix it with the adhesive strip to the empty ribbon core on the supply spindle. Then, place the ribbon at the centre of the ribbon core.
- Rotate the thumb wheel towards the back of the printer until the ribbon pulls tight across the Zebra GK420t print head.
- Now, check that the media is ready to print and then close the printer cover.
- Press the Feed button to have the Zebra GK420t printer take up a minimum of 4 inches of media to remove ribbon and slack wrinkle, and to get the ribbon align on the spindles.
- Now, alter the print mode to thermal transfer to set the printer’s temperature configuration for thermal transfer media. With the Zebra GK420t Setup done, your printer is now ready to print.
How to Configure Zebra GK420t WiFi Printer?
- First, install the Zebra Setup utilities from the CD that came with your printer or download and install it from the web. The Zebra setup utilities is utilized to configure settings on the printer via USB.
- Now, plug in your printer into your PC through the provided USB cable. This way, your Windows PC must auto-start the printer installation. You should now see your printer in the printers window in Zebra Setup Utilities for Zebra GK420t Wireless Setup.
- After that, point to the printer in the upper window, and press the ‘Configure Printer Connectivity’ button. For Zebra GK420t Setup in the wireless mode.
- Choose ‘Wireless’ from the Connectivity Type.
- Next, you will be asked to choose either a Static IP address or DHCP.
- DHCP – means an IP address will be auto-assigned by your network.
- Static – choose this if you need to assign a particular IP address to the Zebra GK420t printer. You will also require your Default Gateway and Subnet Mask information.
Here, the Client ID Hostname and settings can be left blank. Click on next when you’ve made your choice.
- Next, you need to enter in your Security Mode and ESSID. The ESSID is the WiFi name that is shown. It is like when you are picking a WiFi network from your cellphone.
- Care must to taken to type The ESSID exactly, taking extra care of the caps and special characters.
- Security Mode – WPA-PSK/WPA2-PSK is the most known security mode. You need to speak to your network admin if you are not sure about this setting for the Zebra GK420t Wireless Setup.
- Choose String and key in your WiFi Password again ensuring that the password is entered most exactly.
- Now click on Next till the Next button is greys out. Ensure that the ‘Printer’ you selected is active and then click on Finish. This action will transfer the setting to your printer.
- Finally, when you look at the Zebra GK420t printer, you will be able to see an IP address with the message “Printer Ready”. This completes the Zebra GK420t Setup.
Also, check: