

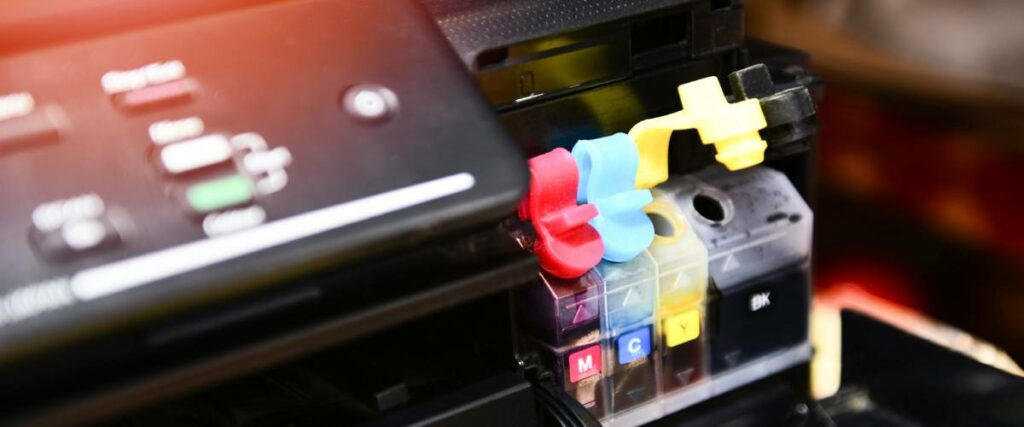
Do you have a Ricoh Printer? Do you want to know how to do a Ricoh Printer Setup? Well, if your answer is yes, then this guide is surely for you. There are different methods to configure a Ricoh Printer. In this guide, we will discuss how you can install a Ricoh Printer. Along with that, we’ll discuss some important FAQs as well.
But before moving ahead, let’s begin with the basics that is how to download and install a Ricoh Printer Driver.
Table of Contents
ToggleExecute Ricoh Printer Driver Setup
The process to download the Ricoh printer driver is easy. You can easily download the Ricoh printer driver with the help of the following instructions:
- Start by visiting the official website of Ricoh printers and scroll down the page to find the drivers that correspond to your printer.
- Next, select the ‘Run’ if you are adding the printer as a single process.
- Now, select where you want to save the extracted file.
- Now, tap on the ‘OK’ option to complete the process.
- After that, browse to the folder you have unzipped the file.
- And lastly, follow the on-screen instructions to install the driver.
Steps to Install the Ricoh Printer Driver
It is necessary to install the latest version of the printer drivers for better functioning of the printers. Also, it is an important step in the Ricoh Printer setup. So, below are the steps explained through which a user can install the Ricoh Printer Driver.
- The first step is to download the Ricoh printer driver.
- Next, open the Devices and Printers option.
- After that tap on the ‘Add a printer’ option to start the Add printer wizard for adding your Ricoh Printer.
- Now, add a local or network printer as an administrator.
- Next, select the ‘Add a printer using IP/TCP address or hostname.’
- Furthermore, add the IP address. Then a list of pre-installed drivers will be displayed. So, you need to add the printer driver that you downloaded earlier.
- After that click on the ‘Browse’ and search the folder that you extracted with the driver.
- Select the ‘Ricoh Printer’ in the Manufacturer box and then select the model of the ‘Printers’ box. Tap on the ‘Next’ option.
- Now, type the name of your printer in the ‘Printer Name’ section and tick the box as ‘Set as the default printer.’
- And lastly, select the ‘Finish’ option to complete the process.
Steps to Install the Ricoh Printer Drivers From CD-ROM
Manage Printers Permission is necessary to install the drivers. So, you must log on as an administrator group member to install the printer driver. Here are the quick steps that users can use to install the printer drivers from the CD-ROM provided with the Ricoh Printers.
- The first step is to tap on the ‘Quick Install’ option on the installer screen.
- After that, a new software license agreement will appear in the dialog box. So, after reading the agreement, tap on the [I accept the agreement] and then select the ‘Next’ option.
- Now, select the machine model that you want to use in the [Select Printer] dialog box.
- Next, tap on the ‘Install’ option.
- After that configure the user code, default printer, and shared printer as required.
- Next, tap on the ‘Continue’ option, and then the installation process will start.
- Now, click on the ‘Finish’ option.
- Lastly, hit the ‘Exit’ option in the first window of the installer, and then take out the CD-ROM.
Regularly Update the Ricoh Printer Driver
If you want to keep your Ricoh Printers in good condition, then you must ensure that its driver is up-to-date regularly. You can update your Ricoh Printer driver from the Ricoh Printer’s official website.
To update the Ricoh Printer driver from the official website, follow the given instructions:
- First, visit the Ricoh printer’s official website, and search for the model of your printer.
- Next, go to your printer product page and download the correct and latest diver to your computer.
- Now, after downloading the file, follow the on-screen instructions to install the latest Ricoh printer driver on your computer.
Set Paper Size in Ricoh Printer Using the Control Panel
Users can follow the given procedure to set the Ricoh Printer using the control panel when loading the standard-size paper onto the bypass tray:
- Start by pressing the User Tools/Counter key on the control panel.
- Next, click on the System Settings.
- Also, select the Printer Bypass Paper Size.
- After that choose the size of the paper.
- Next, tap on the ‘OK’ tab.
- Lastly, click on the User Tools/Counter key and the initial screen will appear.
What are the Ways to Connect the Ricoh Printer to Device?
There are various ways through which a user can connect the Ricoh Printer to a device. Users can select any of the following methods to complete the Ricoh Printer setup.
Steps to Setup the Ricoh Printer with Wifi
The users can easily execute the Ricoh printer setup with the Wifi using the following instructions given below:
- The first step is to Power ON your Ricoh Printer.
- Next, access the settings of the Ricoh Printer or control panel.
- Now, select the ‘Network’ or ‘Wireless’ option.
- After that select your Wifi network.
- Also, enter the wifi network password and confirm the connection.
- Furthermore, test by printing a document from the connected device.
Steps to Follow if Unable to Connect to the Ricoh Printer via Wi-Fi Network
You might have noticed that an error message appears on the screen of your Ricoh Printer when a Wi-Fi connection with the printer is not established. To resolve the issue follow the quick steps mentioned below:
Computer Screen –
- Firstly, click on the Wi-Fi connection on the screen and follow the on-screen prompts to resolve the connection problem.
- Next, configure the settings of your Wi-Fi using the ‘Ricoh Printer.’
Smart Device Screen –
- First, tap on the ‘OK’ option available on the screen to connect using a Wi-Fi network again.
- However, you can also select the ‘Cancel’ option to configure the Wi-Fi settings using the Ricoh Printer.
Setup the Ricoh Printer with a Computer Directly
The Ricoh Printers support the Soft AP functions that enable the printers to act as an access point. So, you can directly connect your computer to the printer without using a Wi-Fi router using a Soft AP function. Here are the steps to perform the Ricoh Printer setup with a computer.
- First, start by pressing the ‘Power Key’ for a few seconds. The power indicator will turn blue and the Wi-Fi function will be enabled on the printer.
- Next, hold the ‘Power Key’ for a few more seconds as well. The power indicator will flash twice and the Soft AP function will be enabled on the Ricoh Printer.
- Now, set the papers on your Ricpoh Printer.
- Furthermore, tap on the ‘Power Key’ three times successively and the ‘Settings’ of the system will be printed out from the Ricoh Printer.
- After that, confirm that the Soft AP function is enabled on your System Setting sheet.
- Now, tap on the ‘Wireless Network’ icon on the taskbar from the computer.
- Also, select the Ricoh printer in the list.
- And lastly, enter the password for the Soft AP, and click on the [Connect].
Use a USB Cable to Connect the Ricoh Printer
If you want to connect your Ricoh printer using a USB cable, then you should follow the quick steps explained below:
- Firstly, ensure that your Ricoh printer is turned ON, and then start the Windows.
- Next, connect the USB cable to the standard USB port B.
- Now, connect the square-shaped connector of the USB 2.0 cable to the B port USB cable.
- Furthermore, connect the smaller connector of the USB cable to the Gigabit Ethernet board USB port.
- Now, connect the opposite ends of the flat connector to the desired devices such as the USB interface of the computer, or a USB hub to complete the Ricoh Printer Setup.
Connect with a Computer via a Wi-Fi Router
Users can set an access point (Wi-Fi router) for the wireless connection with the Ricoh Printer on the computer. Here are some simple steps to connect with a computer via a Wi-Fi router:
- Begin with installing the Ricoh Printer on your computer first.
- Next, press and hold the power key to turn ON the Ricoh printer.
- Next, connect the computer to the printer with the help of a USB cable, via a wifi router or using the Soft AP function.
- After that, click on the ‘Ricoh Printer’ icon on the desktop.
- Now, click on the ‘Setting’ option.
- After that, tap on the ‘Wi-Fi’ option.
- If your wifi settings are disabled, toggle the WLAN, and switch to enable the wifi function.
- Furthermore, tap on the access point to use.
- Now, enter the password to connect with the selected access point, and select the Connect tab to complete the Ricoh Printer Setup.
Connecting with a Smart Device via a Wi-Fi Router
Here are the quick instructions that you can follow for connecting with a Smart Device via a Wi-Fi Router:
- The first step is to download the app from the official website of Ricoh.
- After that, press and hold the power key to turn ON the Ricoh Printer.
- Press and hold the power key for 1 or more seconds until the power indicator turns blue and the Wi-Fi function is blended with the Ricoh Printer.
- Next, press and hold the power key for another 1 or more seconds. After pressing the power key the power indicator will glass twice and the Soft AP function will be enabled on the Printer.
- After that, set the papers on the Ricoh Printer.
- Also, press the power key 3 times successively.
- Confirm that the Soft AP function is enabled on the setting sheet of the system.
- Enable or Disable is displayed for the Soft AP under the Wireless network category.
- If the Soft AP is not enabled, perform the process once again to enable the function.
- Furthermore, enable the Wi-Fi function on the smart device.
- Next, click on the Ricoh printer in the list.
- After that, enter the password for Soft AP, and click on the Join option.
- Tap on the icon on the device smart.
- Also, click on the ‘Settings’ and ‘Wi-Fi’ option as well.
- In addition, if the Wi-Fi setting is disabled, toggle the WLAN and switch to enable the Wi-Fi function.
- After that, tap an access point to use.
- Tap on the wifi to specify an access point by manually specifying SSID, encryption method, and password.
- Once you specify the access point manually, tap on the ‘Connect’ to establish a connection.
- Lastly, enter the password to connect with the selected access point, and click on the OK tab.
- If the settings of the ‘KeyID’ are displayed, then select the option corresponding to the SSID and enter the password.
- If the setting is modified, then the authentication password is “888888”.
- If the smart device is connected to the printer via a Wi-Fi router, then the connection is terminated after the access point change is applied to the Ricoh printer. Connect the same device to the same access point connected with the printer via the wifi router.
- If the connection is established, then the Ricoh printer can be used via the wifi router.
Connecting with a Smart Device Directly
The Ricoh Printer supports the Soft AP function that helps enable the printer to act as an access point. Users can connect their smart devices directly with their iPhones, smartphones, tablets, etc. with their Ricoh printer without using a wifi router with the help of the Soft AP function.
Here are the instructions that you can follow to connect your Smart Device Directly:
- First, press and hold the power key for 1 second or longer.
- The power indicator will glass twice and the Soft AP function is enabled on the printer.
- Next, set the paper on the Ricoh printer.
- After that click on the power key three times successively.
- Also, confirm that the Soft AP function is enabled on the system settings sheet.
- You’ll see the Enable or Disable option displayed on the screen for the Soft AP under the ‘Wireless Network’ category.
- If the Soft AP is not enabled, perform the procedure from the 1 again to enable the function.
- Next, enable the Wi-Fi function on the smart device.
- Tap on the list of the printers.
- Lastly, enter the password for the Soft AP and click on the ‘Join’ option.
- You’ll get the password for the Soft AP in [Passphrase] under the Soft AP section on the System Settings Sheets.
- The password and SSID for the Soft AP can be changed with the help of Ricoh Printers.
- To change the Soft AP function, you can press and hold the power key for more than 1 second. The power indicator will flash three times, and the function will be disabled.
- Also, if the connection is established, you can use the Ricoh printer with the help of a Wi-Fi network.
How to Setup Ricoh Printer to MAC?
Have you recently purchased a Ricoh printer and you don’t have any clue how to connect it to your Mac? So, to be able to connect your Ricoh printer to the Mac, then you need to follow the given steps:
- First, download the printer driver from the official website.
- Now, select the model of your printer and then tap on the download link.
- After that, a set of OS will appear on your device’s screen.,
- So, select the version of Mac OS and tap on the ‘Download’ button.
- The downloaded driver file will appear on the screen, So, install the file in your system by following the on-screen instructions.
If your issue remains unresolved after reading this, please reach out to Ricoh Support.
Frequently Asked Questions (FAQs)
How do I connect my Ricoh printer to my computer?
You can connect your Ricoh printer to your computer by following some quick steps. All you need to do is turn ON your computer and start Windows. Next, insert the USB cable’s (Type B) plug firmly into the slot. After that, insert the USB cable (Type A) into the USB slot of your computer to establish the connection.
How do I access my Ricoh printer settings?
You can access the Ricoh printer settings by following the given steps:
- First, go to the settings and then to the Printer Management section.
- Next, in the Printer Management screen, click on the ‘Edit’ option.
- After that, change the Ricoh Printers settings.
- Lastly, tap on the OK tab.
How do I manually download a Ricoh printer driver?
You can manually add the Ricoh Pinter with the help of the given instructions:
- Firstly, download and install the Ricoh Printer driver.
- Next, open and select the Printers and Drivers section.
- Also, launch the wizard and add a local printer.
- After that, refresh your screen and enter an IP address.
Can I connect my Ricoh printer wirelessly?
Yes, you can connect your Ricoh printer wirelessly. For this, you need to power ON your printer and access the printer settings. In the next step, select the wireless option and choose the wifi network. Moreover, you need to enter the password of your wifi. Lastly, print a test paper.
How do I configure my Ricoh printer on my Mac?
You can set up your Ricoh printer on Mac with the help of the following instructions:
- Begin with downloading the Ricoh printer driver and opening the system preferences.
- Next, select the Printers and Scanners option and launch the Wizard.
- Enter the details of your Ricoh printer and then customize the printer as per your requirements.
How do I set up my printer to my Wi-Fi network?
To configure your Ricoh printer to your Wifi network, place the printer near the wifi router. Then open the Setup, Network, or Wireless Settings menu and choose the wireless setup wizard. Now, select the network name and enter the password to complete the connection.