

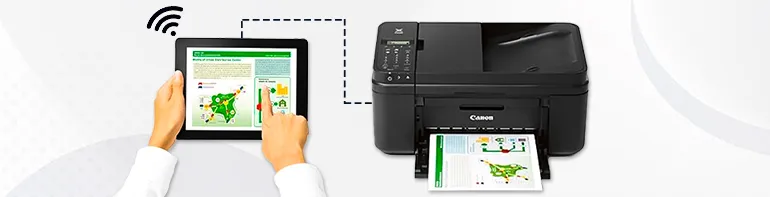
Canon Pixma printers provide unmatched printing. It is an all-in-one printer and can be placed in small spaces. The printer has wireless capability, using Google Cloud Print and Apple AirPrint. However, making a wireless setup of Canon Pixma MX492 can be tricky, but not after reading this guide. If you want to connect a Canon MX 492 printer to wifi, here is a step-by-step guide.
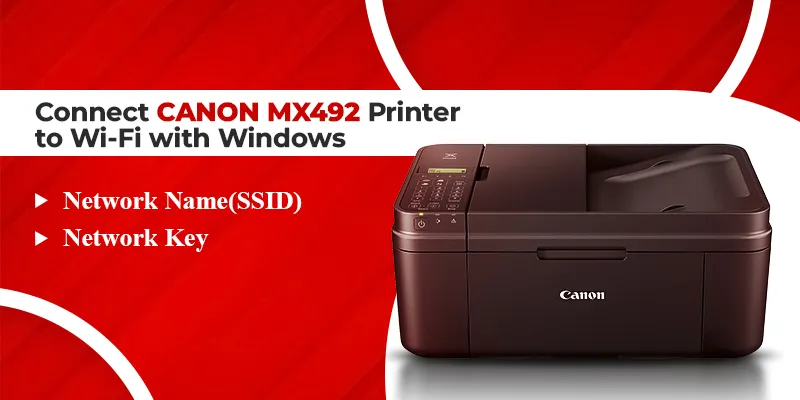
Steps to Connect Canon MX492 Printer to Wi-Fi with Windows
If you have a Windows device, connecting to a wireless network (LAN) is easier. You must have these two pieces of information to Connect the Canon MX492 Printer to Wi-Fi with Windows initially.
- Network name(SSID)
- Network key
Here are the necessary steps.
STAGE 1:
- Turn ON the printer.
- On the printer’s control panel, press the SETUP button.
- Select WIRELESS LAN SETUP, by pressing the left and right navigation keys.
- Press OK.
- Select OTHER SETUP and press OK again.
- In the next option, choose CABLELESS SETUP.
This is how you enable Canon Pixma MX492 for wireless setup. In the next stage, you need to download the essential printer driver on your Windows device.
STAGE 2:
- Log in to PC as an administrator.
- Visit the official website of Canon printers and DOWNLOAD the printer driver.
- After downloading the.exe file to your device, double-click it. Automatic setup begins.
- Press NEXT.
- Choose WIRELESS LAN CONNECTION.
- After that, select CONNECT via WIRELESS ROUTER.
- Select NEXT and choose CABLELESS SETUP.
- A screen will appear showing the “.NET framework”, press YES.
- Proceed with the on-screen instructions to complete the Canon MX492 printer software installation.
- Click on the COMPLETE tab when the setup is complete and press NEXT.
- Select Agree and Do Not Agree to the Extended Survey Program.
- After that, click on the EXECUTE option and press NEXT to run a test print.
- At last, when the installation is complete, choose the “EXIT” option.
Once the software package is installed, you can connect the Canon Pixma MX492 printer to wifi. Now, let us get back to the printer’s display panel.
STAGE 3:
- Follow the steps in Stage 1 and press OK after reaching the WIRELESS SETUP option.
- The MX492 printer will search for the wireless router (access point).
- Press the STOP button, if the message appears indicating to press the WPS button.
- Once the search is complete, use the left and right navigation to SELECT STANDARD SETUP.
- The Canon MX492 will search for the access points again.
- In the next step, choose the WIRELESS NETWORK.
- Press the OK button twice.
- After that, enter the PASSWORD and press OK.
- Once the connection is established, the screen will display “CONNECTED.” Press the OK button to complete the process.
Connect the Canon MX492 to a Wireless Router via WPS
If the users want to know how to connect the Canon MX492 to a wireless router via Wifi Protected Setup, they can follow these steps.
- Switch ON the Canon MX492 printer.
- Press the SETUP button on the display panel.
- Use the arrow keys to select the WIRELESS LAN SETUP option.
- In the next step, if the pinter’s display panel shows “Press WPS button,” then press and hold the WPS button on the wireless router.
- After that, press the OK button on the printer within 2 minutes.
- The display will show “CONNECTED” indicating that the device is linked to the wifi.
- However, after step 3, if the Canon Pixma MX492 shows “STANDARD SETUP, ” then press OK.
- Select the WPS button and press OK.
- In the next step, press the WPS button on the router and press the OK button on the Canon MX 492 printer.
How to Connect Canon Pixma MX492 Printer to Wifi from a MAC?
The Canon Pixma MX492 printers are compatible with MAC devices. You can take the following actions to connect the device.
Before connecting your printer to the network confirm that your wireless router is available and properly set up. Also, confirm that your computer is connected to the network. Make sure your printer is plugged in and turned ON.
- Press the copy button on the upper left of the four-button panel.
- When the screen is ON press the setup button on the bottom right of the four buttons.
- The screen will now display the “Wireless LAN setup” option, press the OK button.
- You will see scrolling text on the screen press the stop button on the right-hand side of the printer panel to display this screen.
- Now, use the right arrow button to find Other Setup and press OK.
- After that, use the right arrow button to find the Cableless Setup and press OK.
- Now, install the software on your Mac.
- Download the installation files from the Canon website.
- Open the downloaded file on your Mac. Click open to start the installation process.
- When prompted enter the administrator name and password you use to install a Helper tool. setup your Mac
- Click on Install Helper, review the information on the opening screen, and click Next.
- After that, select wireless LAN connection as your connection method, then click Next.
- Select connect via a wireless router then click Next again.
- Ensure that your printer is turned ON as the software will search for printers already connected to the network.
- If the printer is already on the list, simply click Next.
- At this time, a dialog box will appear on the screen. It will ask you to confirm the opening of the Canon IJ Setup guide.
- A printer setup screen will be displayed. Now, click Next through the next two screens.
- On the Setup Procedure Selection screen, click “Other Methods.”
- Click on the button labeled “Cableless Setup.” After that, click Next through the next three screens.
- During setup, a box will appear asking for access to the Wi-Fi password in your keychain. If you did not save your network password to your keychain you will need to input this password to continue.
- Click “Allow” to proceed.
- After that, when you see the connection completed screen click next.
- After that, follow on instructions to configure the printer with Mac.
Configure Canon MX492 on a WiFi Network From the Canon Print App
Users have the option to install the Canon print app from the Play Store or Apple Play Store. They can use the Canon Print app to instruct the printer to print, scan, or copy.
Steps to Connect MX492 on an Android Device
Here are the steps you need to take to establish a connection between the wifi and the Canon MX 492 printer for the Android device.
- Firstly, enable the Easy Wireless Connect before starting the Canon Print App.
- Start the app and approve the license agreement. Also, approve any other permissions including the device’s location.
- After that, tap on the Search option to find the Canon MX492 printer. Once the printer is detected, click on the Next button.
- Now, click on the Connect option.
- After that, a message will appear asking you to connect your printer to the wireless network.
- Press “YES” once the network name appears on the screen.
- Enter the password of your wireless router.
- The application will send network data to the Canon printer.
- Wait for the Register Printer screen to show up, then tap it.
- Lastly, click on the Close option to complete the setup.
Steps to Establish Connection on an iOS Device with the Canon Print App
- Firstly, enable the Easy Wireless Connect.
- Open the app and approve the necessary permissions.
- Now, a message will appear – “PRINT would like to find and connect to devices on your local network.” Click on the “Allow” button.
- Now, tap on the “Search” tab.
- A message will pop up – “To set up the network connection, connect your smartphone directly to your printer.” Tap OK.
- Click on the “Join” button to establish a connection between the Wifi and PRINT App.
- A list of networks will appear. Choose the name of your network.
- Enter the password of your network and click OK.
- Lastly, click on the Close button to complete the wireless setup.
How to Change Wireless Network Function on Pixma MX492?
You can change the wireless connection of your Canon Printer. Either you can set up it over a wireless network, put it in the Access Point Mode, or it can be disabled.
- Turn ON the printer and press the SETUP button.
- Now, press the Right Arrow button until Device Settings appear.
- Now, press the OK button.
- In the Device Settings menu, press the Right Arrow button until LAN settings appear.
- Again, press OK.
- After that, select Change LAN and press OK.
- Now, the right and left navigation keys and choose from Access point mode, Wireless LAN, or LAN inactive option.
Frequently Asked Questions
Is Canon Pixma MX492 a wireless printer?
YES. Canon Pixma MX492 is a wireless printer. The users have the choice to connect the printer to wifi. However, the MX492 printer cannot be used over Wi-Fi and via a wired LAN connection (Ethernet cable) at the same time.
How do I connect my Canon Pixma MX492 printer to wifi?
You can connect the Canon Pixma MX492 printer to wifi by pressing the Setup button on the printer. Select WIRELESS LAN SETUP >> OTHER SETUP >> CABLELESS SETUP. The printer will search for the Wireless Network. Select the network and enter the password to establish the connection.
How do I connect my Canon MX492 printer to a new WiFi?
To connect the Canon MX492 to printer wifi, ensure that the wifi is in connection range. Press the Setup tab >> Select Wireless LAN setup >> enter OK. The printer will search for the network. Select the network and enter the credentials to connect.
How do I get my Canon Pixma printer to recognize my wireless network?
Switch ON the Canon MX492 printer. Press the SETUP >> WIRELESS LAN SETUP >> WPS button,” then press and hold the WPS button on the wireless router. After that, press the OK button on the printer within 2 minutes. In the end, the display will show “CONNECTED” indicating that the device is linked to the wifi.
Why is my Canon MX492 printer not connecting to WiFi?
You need to carry out the following checks.
- Ensure that the machine is ON.
- Change the LAN settings.
- Also, ensure that wifi is connection range.
How to do Canon mx492 wireless setup with Android?
You need to install the Canon Print app to use the MX492 printer with an Android device. Open the app and search for the Canon printer. Now, click on the Connect option to search for the network. Choose the network from the list and enter the SSID key to establish the network.