
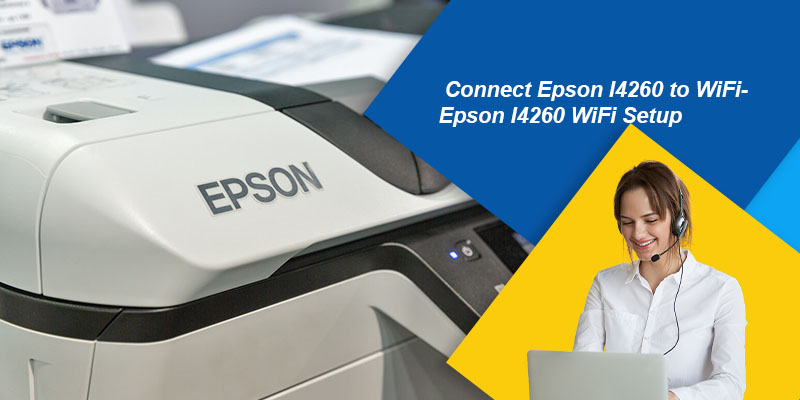
Epson EcoTank L4260 is an All-in-One ink tank printer that allows users to handle all their printing solutions reliably and efficiently at a low cost. It comes up with a compact integrated system, auto-duplex printing, spill-free ink refilling, and much more. It also has a compact size due to which you can place it anywhere and also the print speed is up to 10.5 pages per minute. Thus, with this printer, you can print high-quality laser-like document printing, which can complete a range of tasks quickly by connecting over a wireless network. However, you can also connect the device using the USB cable.
Thus, here in this article, we will discuss the Epson L4260 WIFI Setup. It mainly involves installing the correct drivers and then connecting the system with the printer for the printing solutions.
System Requirements for Epson Printer L4260
Epson L4260 is compatible with many Operating systems. So, you can connect these systems with the Epson printer for reliable printing solutions. Make sure that if your device does not fit with the printer’s requirements, then you may face setup failures or printing issues. Check the list of devices compatible with the Epson L4260 printer.
- Windows 11
- Windows 10 (32 bits and 64 bits)
- Windows 8.1 (32 bits and 64 bits)
- Windows 8 (32 bits and 64 bits)
- Windows 7 (32 bits and 64 bits)
- Windows Vista (32 bits and 64 bits)
- Windows XP (32 bits and 64 bits)
- Window Server 2019
- Window Server 2016
- Window Server 2012
- Window Server 2008 (32 bits and 64 bits)
- Window Server 2003 (32 bits and 64 bits)
- macOS 13.x
- macOS 12.x
- macOS 11.x
- Mac OS 10.5.x to 10.11.x
- Android & IOS devices by downloading the Epson Smart Panel app
Steps to Download and Install Driver and Software For Epson Printer
Drivers play a major role in the setup process of the printer. Also, they help the device (computer, PC, laptop, tablet, etc) to respond precisely to the machine and perform the printing tasks efficiently. So, let us discuss the procedure to download and install the driver to a system that is compatible with the Epson L4260 printer.
- Firstly, switch ON your device and connect it to a high-speed network.
- Now, open the web browser on your device and search for the official Epson site. Epson recommends downloading the drivers only from the authorised site to avoid any failures in the future.
- After that, click on ‘Driver and Software’ on the home page.
- The screen will now ask you to enter the printer’s name and model number. Type ‘Epson L4260’ in the blank field. Hit the enter key.
- Now, the screen will show the driver package which relates to your printer and you can click on the download button to proceed with the Epson L4260 Setup.
- After that, wait till the completion of the download.
- When it finishes, click the downloaded file to start the installation process for Epson L4260 WIFI Setup.
- Now, click on the ‘Yes’ button to begin the installer working. The installer wizard will open up on the screen.
- Hence, agree to the terms and conditions.
- Now, follow the on-screen instructions and click on the Next button.
- Finally, click on the ‘Finish’ button to end the process.
- Check for a success message on the screen after closing the installer.
So, it completes the driver download and installation process for Epson L4260 WIFI Setup. Now, follow up with the connection process to start with the printing jobs or tasks. Before that, firstly manage a high-speed network connection. Place the computer and printer close to the router, and also reduce the network load for stable and non-fluctuating internet.
Connect Epson L4260 WiFi Printer to the Computer Wirelessly
A wireless connection needs the user to connect the printer and the computer to the same network. So, start with maintaining a proper internet connection and connect both devices to it. After that, switch ON the computer and go to its WIFI settings. Connect the router by entering the password. Follow the steps below for Epson L4260 WIFI Setup:
- Firstly, approach your printer and click its home button.
- Now, click on the connection button.
- Hit the WIFI (Recommended) option.
- Now, click on the ‘Start Setup’ option.
- After that, click the option ‘WIFI Setup Wizard’.
- Finally, select the name of the Wireless Network to which you connect your computer.
- Now, enter the WIFI password.
- Lastly, click on the OK button.
- Now, go to the computer and click on the Start button.
- Navigate to ‘Devices & Printers.
- Click on Add a Printer option.
- Choose the name of the printer as ‘Epson L4260’.
- Click on the OK button.
- Close all the windows and check for success.
- After that, print the test page and check for the success of the Epson L4260 WIFI Setup.
If the test page prints successfully, it means that the connection is successful. Else, you need to follow up with the troubleshooting steps to fix the issue, and again follow up with the Epson L4260 Setup process.
Epson Printer Not Connecting to WIFI
You may face failure for the Epson L130 WIFI Setup process due to various reasons such as:
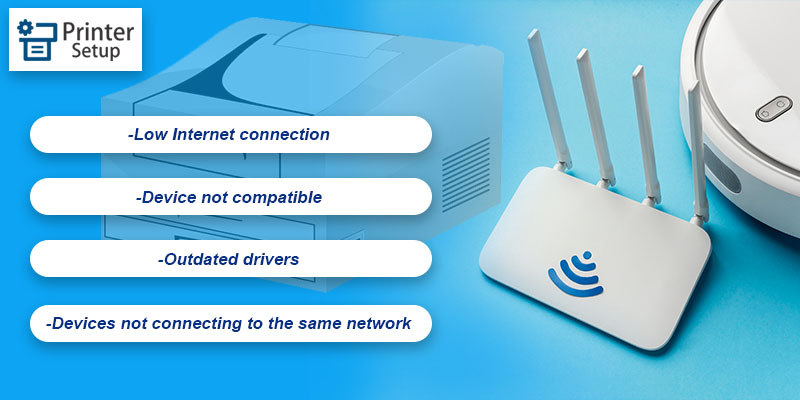
Low Internet connection
To resolve the problem, first, check the speed of the network. After that try to improve it in case you encounter a low speed. Hence, you can improve the speed by placing the router close to the device and reducing the network load. After that, perform the Epson L4260 WIFI Setup again.
Device not compatible
In case the device is incompatible, you can check for the success of the Epson L4260 Setup by replacing the device with the compatible one and installing the driver on it. Then follow the connection process again.
Outdated drivers
In case the drivers have any pending updates, then also you may face failure. To perform all the updates first, and then follow the connection process.
Devices not connecting to the same network
Also, check if the devices connect to the same network or not. In case you are currently using a different connection for the computer and the printer, then connect it with the same network and perform the Epson L4260 WIFI Setup process again.
You need to check all these factors to configure the problem and then take proper measures to fix it. After that, you can continue with the printing tasks successfully. If the issue persists contact the Epson printer support team.
Frequently Asked Questions (FAQs)
Why is my Epson L4260 printer not connecting to the WiFi?
Epson L4260 is connecting to the WiFi because of Lower connectivity, device incompatibility, outdated software & drivers, and if the printer and the computer are not connected to the same network. Thus, you must check for all these issues.
What is the compatible device for the Epson L4260 printer?
The Epson L4260 printer is compatible with Windows 11 to Windows 7, Windows XP (32-bit or 64-bit), Windows Vista(32-bit or 64-bit), Windows Server (2019, 2016, 2012, 2008, 2003), and macOS 13.x to macOS 10.5.x operating systems.
How to connect my Epson L4260 printer to Android or IOS devices?
To connect your Epson L4260 Wifi setup printer with the Android or IOS device, you need to download the Epson smart panel app and follow the on-screen instructions.
How to download the driver and software in my Epson L4260 WiFi setup printer?
To download the Epson L4260 driver and software, visit the Epson official website, go to ‘Epson Connects download’ and as per your computer model download the driver from the list.
What is the use of the Epson Connect printer setup utility?
The Epson connect printer setup utility helps the user to connect the Epson 4260 printer for printing email documents, and photos from any device which are received through mail.

