Table of Contents
ToggleCanon Pixma TS207 Specifications
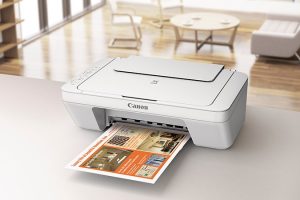
- Canon Pixma TS207 is uniquely created with a grid-marked surface to resist scratches and fingerprints.
- It prints borderless and crisp photos as well as high-quality text documents.
- The Canon Pixma TS207 printer only has the print feature.
- It is compatible with USB connectivity and can be connected wirelessly.
- It has good quality ink cartridges for high-level quality printing on Canon TS207 Setup.
How do I set up my Canon Pixma TS207?
- Using a scissor or any other tool cut the TS207 printer’s package to open the container box.
- Inside the box, you will find a small cardboard box that has the printer’s USB cable, power cord as well as ink cartridges.
- You must go through the ‘Get Started’ pamphlet before you begin with the Canon Pixma TS207 Setup.
- Pull off the styrofoam packing from the sides of the printer.
- Connect one part of the USB cable within the Canon TS207 printer’s port.
- Unwrap the plastic cover of the printer and remove the orange tapes from it before you actually go for Canon TS207 Setup.
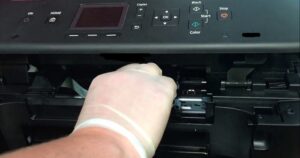
- Next, open the ink cartridge door at the center of the printer.
- Then, hold the ink cartridges and remove the orange protective cover off the ink cartridge.
- Now, install the Color ink cartridge and the black ink cartridge inside the left slot and right slot respectively.
- Lift the paper input tray and set the width guides properly.
- Now, load the paper inside the Canon TS207 printer with the print side facing up.
- Next, install the drivers for Canon Pixma TS207 printer from the official site for other steps with Canon Pixma TS207 Wireless Setup.
Canon TS207 Driver Download – for Windows
- Push the ON/OFF switch on the Canon TS207 printer and power it on.
- Power on your Windows computer and retain the computer in ready condition.
- Download the Canon TS207 Setup drivers by clicking the link given on the official Canon site.
- Also, ensure that you have enough storage space on your computer before you go for downloading the printer drivers,.
- Click on ‘Easy Install’ option and start the printer driver installer.
- Follow the instructions to install the full printer drivers needed for Canon Pixma TS207 Setup.
- Check on the license agreements as well as the end user terms for the printer drivers.
- Insert one end of the USB cable within the USB port of the printer.
- Fix another end of the USB cable into the USB port of the computer.
- Next, print a sample page after you have installed the necessary printer drivers as a step toward the Canon TS207 Setup.
Canon Pixma TS207 Driver Download – For Mac
- Connect one end of the USB cable inside the port of the Canon Pixma TS207 printer.
- Switch on your Mac device and fix another end of the USB cable into the port of the computer.
- Now, download the drivers for the printer from the link given on the printer’s official site.
- Then, double-click on the installer icon and click on OK on the screen for authentication.
- Next, on the Driver menu screen, click on the Easy Install option.
- This will display the list of applications included in the driver file on your Mac computer. Click Install and go through the end user agreements before you proceed.
- Click on the checkbox to approve the agreement.
- When the User Registration screen shows up, choose the ‘Next’ option.
- On the Installation Completed screen, click on Restart.
- Try printing a sample page for Canon TS207 Setup.
Canon Pixma TS207 Wireless Setup – Canon TS207 Driver Installation
- Switch off the Canon Pixma TS207 printer and make sure that all the lights are off on the setup panel.
- Start Windows by switching on your computer.
- Insert the CD-ROM meant for printer setup within the CD-Drive and wait until the Installer gets launched.
- Choose and run the msetup4.exe option on the AutoPlay screen that shows up.
- On the End User Account Control window, click on ‘Continue’ and choose Easy Install. Also, approve the list of applications that are installed and choose Install.
- Read the License Agreements carefully and choose Yes to go ahead with the Canon TS207 Setup.
- When the Printer Connection window shows up, affix one end of the USB cable to the port of the printer.
- Insert the other end of the USB cable into the port of the computer.
- Click on Next and restart your computer to accomplish the installation of the printer driver.
How To Link Canon Pixma TS207 Printer To Your Computer?
- Switch off the Canon Pixma TS207 printer when you are about to install the driver.
- Download the Canon printer drivers from the official Canon printer links given on the site.
- Locate the printer setup file from the Downloads folder list.
- Go ahead with the on-screen instructions and do the necessary functions.
- When the ‘Connection Type’ screen shows up, select the USB cable connection for Canon TS207 Setup.
- Now, put one end of the USB cord into the Canon TS207 printer USB port to go ahead with the Canon Pixma TS207 Wireless Setup.
- Plug another part of the USB into the computer’s port for USB.
- Now, restart your computer and switch on the Canon Pixma TS207 printer.
- Put sufficient papers within the printer input tray and insert the ink cartridges into the ink cartridge slot.
- Now, Print a sample page from your Windows computer.
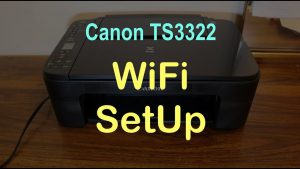
Connection Set-up For canon Pixma TS207 Printer – Wireless/WiFi/WPS
Before starting with anything, some conditions must be met for the WPS pushbutton method of Canon TS207 Setup.The access point contains a WPS push button. You need to check this with your device’s user guide for specifications.Your network must support the Wi-Fi Protected Access or WPA2 protocol.Follow the steps below to complete the Canon TS207 Setup:- Make sure your wireless router is nearby of the Canon TS207 printer & the WPS button is ready to start.
- Press & hold the Wireless button on the printer until the wire-less lamp starts flashing.
- Press the Colour button (C) on the printer.
- Press the Wireless button till the Direct lamp lights up.
- Press the Colour button and ensure that the wire-less lamp and the ON lamp flash. Then, within 2 minutes, on the wireless router, press the WPS button. The WiFi lamp in blue on the printer will continue to flash while it searches, and the WiFi and Power lamps will flash while it connects to the access point.
- When the Canon Pixma TS207 printer successfully makes a connection to your wireless system, the WiFi and power lamps will stop blinking and remain lit. The network lamp lights up to complete the Canon Pixma TS207 Wireless Setup.