Table of Contents
ToggleEpson AirPrint Setup – Connect a Printer Wirelessly Over a Network
For the wireless setup, the user must make sure to connect the Printer and the Apple computer over the same network. The network must be running at a high speed without any fluctuations or disturbance. Follow the steps below for the setup process.
- Download the Epson iPrint app on your Apple device.
- To download the application, visit the App Store and search for the Epson iPrint application. Hit the download button and wait for the process to complete.
- Now, go to the home screen and click on the app icon to open the application.
- Click on the option ‘Printer Not Selected, Tap to Select the Printer’.
- If the screen shows the name of your Printer, then directly click on it.
- If the screen does not show the name of your Printer, then click on the search option. Then wait for it to scan and show the name of your Printer.
- If still, there are no results then connect manually using the Manual IP.
- Go to the Manual IP tab on the home page of the application.
- Click on the ‘Add’ button.
- Enter the name of your Printer.
- Click on the ‘Done’ button.
- It will now add the Printer and you can successfully perform the entire printing task directly.
Make sure that while performing the Epson AirPrint Setup you place the router close to the device to avoid any disturbance in the network. Do not connect too many devices to the same network to maintain the speed. If you already have the Epson iPrint app on your device, then check for any pending updates before adding the Printer for a successful connection.
Related: Epson l3210 wifi setup
Epson AirPrint Setup – Connecting to the Remote Printer
Epson AirPrint also allows you to print the files and documents remotely over a network. For the wireless setup, make sure to connect to the same network as of Printer. It will help you to assign the email address directly from the Epson iPrint application. You can then print remotely from your device using the email address. Follow the steps below for the remote setup process:
- Open the Epson iPrint application on your device.
- If you do not have one, then you can download it online from the official App Store.
- Make sure you are using the latest version of the app.
- After you open the app, select the option “Printer Not Selected, Tap to Select the Printer”.
- Click on the ‘Remote’ option.
- Then, click on the ‘Add’ option.
- Hit the ‘Yes’ button.
- Click on the option, ‘Get Email Address’.
- Go with the flow of instructions.
- If you already have an email address, then directly type it to proceed with the Epson AirPrint Setup.
- Click on the name that represents your Printer.
- Now, click on the ‘Show Details’ option.
- Click on the ‘Visit the website’ button.
- Click on the “register’ button.
- Now, the system screen will show you an email address that you can use for the remote connection.
- Click on the ‘Accept’ button, and hit the ‘next’ button.
- Hit the OK button, and the screen will show the website for the connection process.
- Type your email address and password, and then hit the OK button.
- Now the screen will show you the email address of the Printer. Copy the details.
- Go to the Epson AirPrint Setup screen and paste the email address.
- Click on the ‘Done’ button to finish the wireless setup process.
You can now print your documents remotely from your system using the AirPrint email address. It is quite an efficient and reliable process for handling all your printing tasks.
Related: Epson l805 wifi setup
Epson AirPrint Setup – Connect Printer using the Wi-Fi Direct
Another reliable method you can follow for the wireless setup of the printer and its connection with your system is via –Wi-Fi Direct. The process is quick and simple with 100% successful results. Follow the steps below to continue with this process.
- Open the Epson iPrint application on your device.
- Select the option “Printer Not Selected, Tap to Select the Printer”.
- Click on the option ‘Wi-Fi Direct Setup’.
- If you are working on a Printer with an LCD screen, then select the option “Printer with an LCD screen”, else click on “Printer without LCD screen”.
- Go with the flow of the instructions by hitting the next button.
- It now completes the wireless setup process and you may continue with the printing task successfully.
How Do I Enable AirPrint on My Epson Printer
To enable the AirPrint on the Epson printer, you can follow up with the simple process using the Wi-Fi Direct option. Click on the Wi-Fi Direct button and then select the name of the printer you are using. It now enables AirPrint and you can print the documents wirelessly and remotely.
Why is AirPrint on My Epson Not Working?
The main reasons for the failure in the AirPrint connection can be:
- Aeroplane mode is ON
- Incompatibility of the device
- Failure in the connection process
- Devices not running on the same network
- Pending software updates
You can follow the troubleshooting measures to handle these problems and then print using the AirPrint successfully.
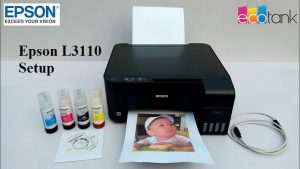
Related: Epson l3110 wifi setup
Can I AirPrint to My Epson Printer
Epson printer supports the AirPrint printing which allows you to directly print the pages, files and documents without the need for any driver installation and follow up with the wired and wireless connection process between the systems.
If you need more help then try contacting epson connect printer setup team for help.
Read – Epson Support