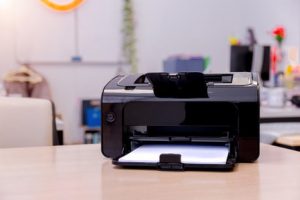
Brother DCP T220 Printer is a user-friendly three-in-one printer that allows the user to print copies and scan the files efficiently. It provides high-quality prints at affordable rates. You need to connect the printer to your computer to use it remotely and access its facilities. Here, we will discuss the procedure for Brother DCP T220 Setup. The setup process consists of downloading the printer’s drivers to the compatible system and then connecting it wirelessly over the network. You can also connect the printer using the USB cable but it is not a reliable connection. Make sure that you are using a high-speed internet connection while performing the printer setup process.
Table of Contents
ToggleCheck Device Compatibility for Brother DCP T220 Setup
There are a large number of devices that are compatible with the printer. You can download and connect the compatible device only to avoid any printing failures in the future. So, check the system requirements below for the device that is compatible with Brother DCP T220 printer.
-
- Windows Operating System: Windows 11, Windows 10, Windows 8.1, Windows 8, Windows 7
- Mac Operating System: macOS11, macOS12, macOS10.13, macOS10.14, macOS10.15
- Linux: Linux rpm, linux deb
- Operating temperature: 10 to 35 degree Celsius
- Operating humidity: 20 to 80 percent
These are the system requirements for the Brother Printer setup process. In case your system does not match these requirements, then you cannot connect it. It is better to arrange the compatible device first and then perform the Brother DCP T220 Setup. It will provide you the reliable and efficient results in one attempt for the setup.
Also check: Brother DCP T710W Setup
Download and Install Brother Printer Driver for Brother DCP T220 Setup
The setup process is incomplete without downloading and installing the driver and software package for the printer you are using. You need to download the driver only from the authorized site. Also, you need to connect the system with a high-speed internet connection for the setup process to proceed. So, follow the steps below for driver downloading and installing:
-
- Firstly, take a computer that is compatible with the printer.
- Connect it with the active network internet connection.
- Now, go online to the official Brother website.
- Search for the ‘Driver and Software’.
- Now, write the model of the printer as Brother DCP T220 and hit the enter key.
- The system will now show you the driver that is suitable for your printer. Hit the download button next to it.
- Wait for the download to complete.
- After that, click on the downloaded file to install the driver and software package.
- Now, the installer wizard will open up on the screen. Agree to the terms and conditions.
- Go with the flow of the installer.
- Finally, complete the installation process by clicking on the ‘Finish’ button.
So, it completes the driver installation for the Brother DCP T220 Setup process. You now have to follow up with the connection process. After that, you can successfully print the documents and files using the Brother printer.
Also check: Brother MFC-J3520 Wireless Setup
Connect the Printer with the Computer – Brother DCP T220 Setup
You can complete the connection process for the Brother printer either using the wired connection or the wireless connection. The wired connection requires connecting the devices using the USB cable. One end of the cable goes to the Printer and the other end goes to the computer. After that, follow the instructions on the screen to complete the connection process. But, this method is not reliable and productive. It may lead to more hardware failures and faults. The best method is to connect the device using the internet connection wirelessly. Follow the steps below to complete the Brother DCP T220 Setup process by connecting the device wirelessly:
-
- To connect the devices, firstly you need to connect the computer and the printer with the same network.
- Switch ON the computer, and go to its WIFI option.
- Enter the password for your network and click on the ‘connect’ button.
- Check the success of the connection.
- Now, switch ON the printer and connect it to the same network.
- Click on the WIFI button on the printer. ‘
- Use the arrow keys and connect to the network by adding the name and the password.
- After that, go to the Start button of the computer.
- Then, navigate to ‘devices and printers.
- Click on ‘Add a device. Select the name of the printer from the list of printers or devices.
- Go with the flow of the instructions.
- Finally, click on the OK button.
So, it completes the connection process for the Brother DCP T220 Setup. You can now print the test page to check the success of the setup process. If the test page prints successfully, it means that the setup is complete and you can now print your files and documents directly and remotely from your computer.
Otherwise, if the test page does not print successfully, then there can be an error for the connection or Brother DCP T220 Setup process. The error can be due to bad internet speed, incompatible devices, pending updates, server downtime, hardware and software issues, etc. You have to troubleshoot the problem and fix it for the success of the setup.
Contact Brother Printer Customer Care For Brother DCP T220 Setup Issues
In case of any issue with the setup process, you can call the customer care phone number. The executive will help you to diagnose the problem and get the desired solution. The official phone number is 1-800-222-422. You can call on this number anytime as the support team is present 24 hours a day, seven days a week. Apart from that, you can also drop an email to the executive and wait for a response.
The expert team at brother printer support will help you to get rid of the issues as soon as possible so that you can follow up with the printing solution as soon as possible.
More helpful posts: