More is expected from you every day at your workplace in terms of efficiency, accuracy, and durability. Using decades of innovation and modern technology, Zebra designs its products to help you perform better in your day-to-day tasks. Discover your performance advantage with ZT410 Series printers which has features and form factors made for you. A tough and feature-loaded printer, ZT410 printers come with a standard set of advanced functionalities to allow their utility in the widest array of logistics, manufacturing, and retail applications. Built with embedded advancements in technology, Zebra ZT410 Setup is the best for you in terms of connectivity options, print speed, management and support tools applicable in a wide range of environments.
You don’t have time for printer failures in your workplace. But when they’re down, so are your operations. Skip this issue with Zebra ZT410 printers. Indeed, print with confidence when you know that you have a partner by your side with years invested in thermal printing technology. Engineered to be hassle-free, Zebra ZT410 Setup delivers the intelligence, autonomy as well as security to give you perfect peace of mind with its operations. With simple setup leading to quality printing and performance-enhancing software tools, Zebra ZT410 printers are designed to be durable, self-reliant and endlessly work-oriented. Beyond just hardware, they provide the easiest set up operations with some great user-friendly features.
How do you set up your zebra zt410?
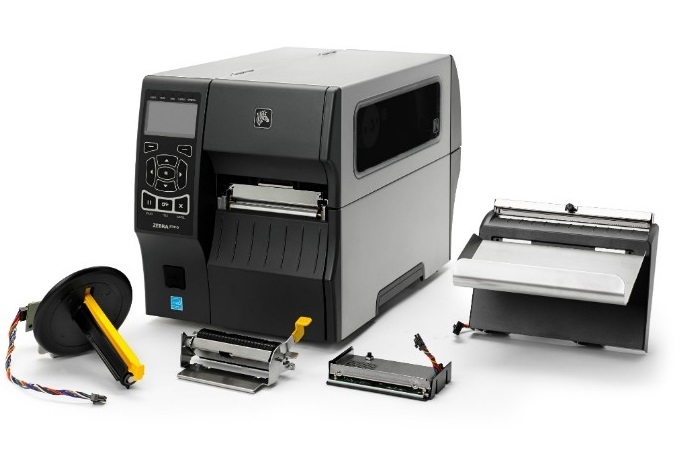
The Zebra ZT410 Series of printers are reliable and rugged RFID printers that encode and print on RFID labels saving you much of time and money. In case your application is in need of any RFID printer, ZT410 is your finest choice. Although like many RFID printers, Zebra ZT410 Setup can be a bit long-drawn process if you are not accustomed to such procedures, we have a way out.
In order to make the procedure simpler, effortless and get the Zebra ZT410 application up and moving quickly, we will take you through with the following steps:
-
- Turning the Zebra ZT410 printer on
-
- Putting the ribbon in the Zebra ZT410 printer
-
- Putting the RFID tags in the printer properly
-
- Positioning the laser correctly
-
- Calibrating the Zebra ZT410 printer
Let us see how we are going to go through all the steps that involved configuring the Zebra ZT410 to print and of encoding the RFID tags.
First, we go through the steps to set up the Zebra ZT410 printer with all the essential parts and components of printing and encoding your tags. Thereafter, we will go through the process of calibrating Zebra ZT410 printer for a specific tag for the completion of the Zebra ZT410 Setup.
To setup Zebra ZT410 printer properly for use with RFID tags, you will need to do the following:
Tags – We will use the Smartrac Dogbone tags with the R6 IC.
Printer Ribbon – Use the Zebra high-performance Resin ribbon.
Turning the Zebra ZT410 printer on
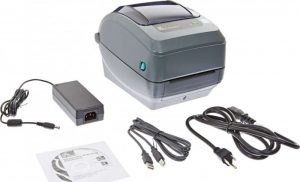
Starting the process, you will link the ZT410 printer to power outlet and turn it on. The ZT410 has its power switch at the back of the printer.
Putting the ribbon in the Zebra ZT410 printer
Next, for Zebra ZT410 Setup, we will install the printer ribbon. The printer ribbon installation differs from one printer to another. For the ZT410 printer, the ribbon will spool from its position below the printer head going up the ribbon roller. You need to simply fix the ribbon on to the ribbon roller and move it round rolling a few times to make the ribbon position tightly against the Zebra ZT410 printer print head.
Related: Zebra GK420t Setup
Putting the RFID tags in the printer properly
Next, it is time to setup the tags to feed through the Zebra ZT410 printer. The tag reel fixes itself on the rod at the far back of the ZT410 printer. This part is required to be moved so that it places itself tightly against the reel. The tags will then move below the shelf of the printer and will need to be taken care of from here. This is one of the steps for the Zebra ZT410 Setup.
The yellow guide rails that can be seen there is utilized to stop the tags from sliding, and the laser below the tags can be used for calibration. Once you are through with this part, the tags can be rolled on via the Zebra ZT410 printer head.
Positioning the laser correctly
Now, you will require to set the calibration laser in its proper position before you close the print head and do a printer calibration. Normally, the laser will need to be set in such a way that it aligns with that part of the inlay of the tag that has the broadest surface area. This will differ from tag to tag for Zebra ZT410 Setup. For example:
-
- For paper faced tags, the laser can be positioned somewhere on the left side of the tag. The laser will be able to tell the difference between the gap between the tags and the tag itself.
-
- For tags that are poly-faced and in those case where the inlay of the tags can be seen, the laser will require to be line up with the widest area of the inlay. In this manner, the laser can distinguish between the gap between each inlay and the inlay.
Once the tags and ribbon get loaded into the ZT410 printer and the calibration laser has been configured, close the print head and move ahead with calibrating the printer for the tags for Zebra ZT410 Setup.
Calibrating the Printer
Next, configure the ZT410 printer to work with the tags that you have chosen.
Press the “Home” button to come to the main menu, where you can change the printer’s settings. The menu need to be navigated via the directional buttons present there, and any option can be chosen with the help of the “OK” button.
Now come to the “Settings” option and press “OK” to see the Zebra ZT410 printer configurations. Next, Press the “right” button to see the Media Type setting on the screen. Press the up button to select the Notch/Gap option. This helps the printer to utilize the calibration laser to look for the length of the tags by exploring the area between the tags. This is for the next step for the Zebra ZT410 Setup.
Next, you need to press the right button again to reach the Print Method configuration and choose the Thermal Transfer option to enable print images onto the tags.
Once through with these settings, you can do a media calibration by a press of the pause button on the Zebra ZT410 printer. This function will run the tags through the Zebra printer and will utilize the calibration laser to search for the tags. Once calibration is done, you need to press the “Feed” button a few number of times and make it sure that the full tag goes through every time it is pressed. If only a portion of the tag or more than one tag is fed through, the media calibration will require to be done again. If the issue goes on, the functionality of full media calibration that can be located in the printer’s Tools menu, can be used for Zebra ZT410 Setup.
Once done with the media calibration, perform an RFID calibration. First, come to the RFID icon from the home menu on the Zebra ZT410 printer, and select “OK”. Now, press on the right button to choose the RFID Calibrate choice and choose “Start” to begin the RFID calibration steps. Once the calibration is done, the tags are ready to be encoded.
Also, check: