Dell B1160W Wireless Setup

Bookmark
ClosePlease loginn
Last Updated - March 4, 2023
Services List
Canon Pixma TS8050
Get In Touch

Dell B1160W Wireless Setup

setup-printerwireless
dellprinter

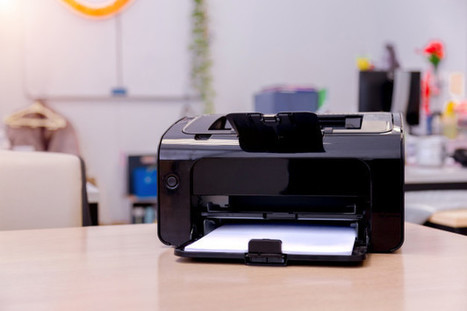
The Dell B1160W is a wireless mono laser printer model. The compact size of the printer ensures the ease of placing it wherever you want. Since the printer is wireless, you can place it even far from the computer and the router if you wish. You do not have to unnecessarily add in more cables and plugs to the printer. The printer uses only one cable, which is used to connect it to the power outlet. A single toner cartridge in the printer can print up to 1500 pages. And the printer itself costs less than what other brands and models charge for the same features.

Dell B1160W Printer Hardware Setup

Before you start off with the Dell B1160W Wireless Setup procedure, make sure that you have setup the hardware of the printer.

  • Remove all the packaging off the printer and its components.
  • Pull the cartridge access door and take off the film from the scanner of the printer.
  • Take out the toner cartridge and shake it gently. This will help the toner spread evenly throughout the cartridge. This ensures quality print.
  • Place the cartridge back in the printer and close the access door.
  • Pull out the paper try and adjust the paper as per the guides. Close the tray afterwards.
  • Connect the power cable to the printer. And put the other end of the cable in the power outlet and turn on the switch.

Try positioning the printer not far from the computer and the router. This will help the printer work better and faster.

Related: Dell E514DW Wireless Setup

Completing The Dell B1160W Wireless Setup Process Using The PIN Mode

You can connect the printer to a wireless network using the PIN method. Keep the network name and the PIN or the password to the router handy before you proceed with steps.

  • You will see the WPS or the Wi-fi Protected Setup push button on the control panel of the printer model. Press and hold this push button for up to 10 seconds.
  • Next, press and hold the Wi-fi protected setup push button on the router for about 4 seconds. Release the button when you see the LED light stable.
  • The printer will start connecting to the access point or the router.
  • Enter the eight-digit PIN on your computer. Make sure that you type in this PIN within 2 minutes of releasing the WPS push button on the router. The LED will blink till you enter the eight-digit PIN.
  • The LED on the printer blinks continuously till the time it is connected to the wireless network. And once the printer has successfully connected to the wireless network, the LED on the printer will be stable.

If you want to complete the Dell B1160W Wireless Setup process using the PIN method, keep the password to the router handy.

Related: Dell C1760NW Wireless Setup

Connecting The Dell B1160W To A Wireless Network Using The Access Point Mode

You can connect your Dell printer to the wireless network using the Access Point. This method is often considered the easiest of all for the Dell B1160W Wireless Setup process. Follow the instructions mentioned here –

  • Connect the power cable to the printer. Plug the other end of the cable into the power port and turn on the switch.
  • Turn on your computer or laptop and the router. Make sure that your router has its LED lit. And that the internet is working.
  • If you see the ‘Found New Hardware Wizard’ window during the installation, click the ‘Cancel’ tab and move to the next step.
  • Your printer must have come with a CD. Insert this CD in the CD-ROM drive. The CD automatically runs the installation window.
    If this installation window does not pop up on your screen, you can carry out these steps to run the CD.
    Select the ‘Windows’ icon. Then go to ‘All programs’. Go to ‘Accessories’ therefrom and select the ‘Run’ tab.
  • Click ‘Next’ and select the ‘Connect to computer wirelessly’ option.
  • The software will search for all the networks available around the computer. After the Windows shows you your network, type in the SSID or the network name to your router. Select ‘Next’ afterwards.
    The wireless network security window will show up on your screen. Enter the WPA key or the network password and select ‘Next’.
  • The next window will show if all the details you have entered are correct. Once you have checked the password and the network name, select ‘Next’.
  • The ‘Wireless Network Setting Complete’ window will pop up on your screen.
  • When the ‘Conform printer settings’ window appears on the screen, click ‘Next’.
  • Choose the components you need to install and click the ‘Next’ tab.
  • After you have select these components, you can change the printer name and make changes to the default printer setting feature and you can also change the  port names of all the printers you are using with the respective computer. Select ‘Next’.
  • Once the installation process is complete, the window will ask you to print a test page. If you wish to print this test page, select ‘Print’.
  • Once the test page is printed, click the ‘Finish’ tab.

Although the Dell B1160W Wireless Setup steps are easy to carry out, you still need to be cautious about a few of the points mentioned above.

AVAIL WORLD CLASS DELL PRINTER SETUP FOR YOUR PRINTER

Dell B1160W Wireless Setup

dellprinter

The Dell B1160W is a wireless mono laser printer model. The compact size of the printer ensures the ease of placing it wherever you want. Since the printer is wireless, you can place it even far from the computer and the router if you wish. You do not have to unnecessarily add in more cables and plugs to the printer. The printer uses only one cable, which is used to connect it to the power outlet. A single toner cartridge in the printer can print up to 1500 pages. And the printer itself costs less than what other brands and models charge for the same features.

Dell B1160W Printer Hardware Setup

Before you start off with the Dell B1160W Wireless Setup procedure, make sure that you have setup the hardware of the printer.

  • Remove all the packaging off the printer and its components.
  • Pull the cartridge access door and take off the film from the scanner of the printer.
  • Take out the toner cartridge and shake it gently. This will help the toner spread evenly throughout the cartridge. This ensures quality print.
  • Place the cartridge back in the printer and close the access door.
  • Pull out the paper try and adjust the paper as per the guides. Close the tray afterwards.
  • Connect the power cable to the printer. And put the other end of the cable in the power outlet and turn on the switch.

Try positioning the printer not far from the computer and the router. This will help the printer work better and faster.

Related: Dell E514DW Wireless Setup

Completing The Dell B1160W Wireless Setup Process Using The PIN Mode

You can connect the printer to a wireless network using the PIN method. Keep the network name and the PIN or the password to the router handy before you proceed with steps.

  • You will see the WPS or the Wi-fi Protected Setup push button on the control panel of the printer model. Press and hold this push button for up to 10 seconds.
  • Next, press and hold the Wi-fi protected setup push button on the router for about 4 seconds. Release the button when you see the LED light stable.
  • The printer will start connecting to the access point or the router.
  • Enter the eight-digit PIN on your computer. Make sure that you type in this PIN within 2 minutes of releasing the WPS push button on the router. The LED will blink till you enter the eight-digit PIN.
  • The LED on the printer blinks continuously till the time it is connected to the wireless network. And once the printer has successfully connected to the wireless network, the LED on the printer will be stable.

If you want to complete the Dell B1160W Wireless Setup process using the PIN method, keep the password to the router handy.

Related: Dell C1760NW Wireless Setup

Connecting The Dell B1160W To A Wireless Network Using The Access Point Mode

You can connect your Dell printer to the wireless network using the Access Point. This method is often considered the easiest of all for the Dell B1160W Wireless Setup process. Follow the instructions mentioned here –

  • Connect the power cable to the printer. Plug the other end of the cable into the power port and turn on the switch.
  • Turn on your computer or laptop and the router. Make sure that your router has its LED lit. And that the internet is working.
  • If you see the ‘Found New Hardware Wizard’ window during the installation, click the ‘Cancel’ tab and move to the next step.
  • Your printer must have come with a CD. Insert this CD in the CD-ROM drive. The CD automatically runs the installation window.
    If this installation window does not pop up on your screen, you can carry out these steps to run the CD.
    Select the ‘Windows’ icon. Then go to ‘All programs’. Go to ‘Accessories’ therefrom and select the ‘Run’ tab.
  • Click ‘Next’ and select the ‘Connect to computer wirelessly’ option.
  • The software will search for all the networks available around the computer. After the Windows shows you your network, type in the SSID or the network name to your router. Select ‘Next’ afterwards.
    The wireless network security window will show up on your screen. Enter the WPA key or the network password and select ‘Next’.
  • The next window will show if all the details you have entered are correct. Once you have checked the password and the network name, select ‘Next’.
  • The ‘Wireless Network Setting Complete’ window will pop up on your screen.
  • When the ‘Conform printer settings’ window appears on the screen, click ‘Next’.
  • Choose the components you need to install and click the ‘Next’ tab.
  • After you have select these components, you can change the printer name and make changes to the default printer setting feature and you can also change the  port names of all the printers you are using with the respective computer. Select ‘Next’.
  • Once the installation process is complete, the window will ask you to print a test page. If you wish to print this test page, select ‘Print’.
  • Once the test page is printed, click the ‘Finish’ tab.

Although the Dell B1160W Wireless Setup steps are easy to carry out, you still need to be cautious about a few of the points mentioned above.

Call Now ButtonGet Human +1-888-342-4338