What happens if, while printing an important document, the printer starts printing horizontal lines on the paper? We know it can be very frustrating, and without knowing the reason, it can create a problem. Moreover, it is not the basic job of everyone to know the facts that what causes their Dell printer print horizontal lines, and the ways to solve the issue. However, no one can give their whole time to solving the cause, but prior knowledge can help to work out the situation. However, if the problem continues, then it is best to take it to a nearby repair shop.
Table of Contents
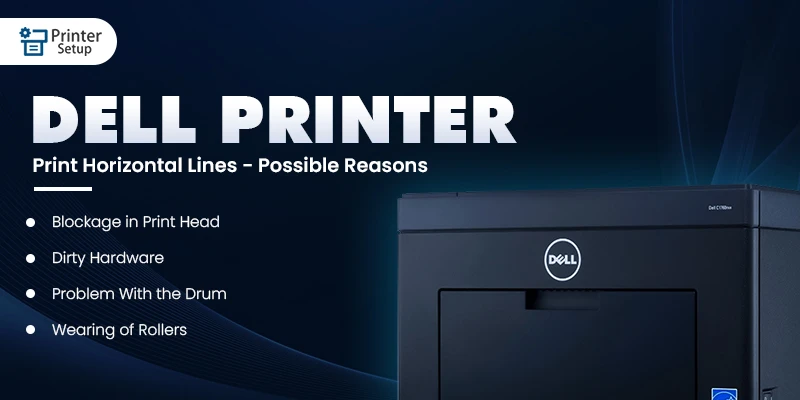
ToggleDell Printer Print Horizontal Lines – Possible Reasons
There can be any reason that causes Dell printer to print horizontal lines on paper. Here are a few possible ones.
Blockage in Print Head
If anyone faces horizontal lines on their Dell printer, it is because of blockage in the print head. Initially, one can observe the symptoms with breaks in their prints. However, it is difficult to identify which color is at fault because the print combines one or more ink colors.
Dirty Hardware
There is a chance that the Dell printer print horizontal lines in dark color, but does not print properly. The basic cause of the printer acting like this is dirty hardware. No matter how good is your Dell printer, it can act weirdly due to foreign objects. Whether it is dust, debris, or a small piece of paper, it can cause the Dell printer print horizontal lines. A complete cleaning is required that can help in solving the issue. A minute residue can create a major problem with optics, so it is best to keep the hardware clean.
Problem With the Drum
Dell printer print horizontal lines, like yellow, pink, blue, or black lines, suggests the problem with the drum. It resembles a camera, a photoconductor, that snaps the photo. Therefore, a drum is sensitive, and when it gets damaged, there will be an issue while printing each paper. A drum can be fixed or can be replaced. It is recommended that the drum must be replaced at regular intervals.
Wearing of Rollers
Roller in the printers plays a vital role in handling the paper. But with consistent use, rollers can wear out. Due to the wearing of the roller, the paper does not slide on it smoothly, causing your Dell printer to print horizontal lines.
Wrong Paper Size and Quality
Another possible cause of horizontal lines appearing on the paper can be the paper itself. Dell suggests a range of paper sizes and qualities suitable for their printer. If you are using the wrong paper, then it could be possible that your Dell printer causes printing flaws. If you choose the wrong paper for your specific task, then horizontal lines are inevitable.
Low Ink Levels in Cartridges
Low ink levels in cartridges can also cause your Dell printer to print horizontal lines. Due to low ink levels, the printer may not be able to distribute the ink evenly and thus you may find horizontal lines on paper.
Printer Driver and Network Issues
If your Dell printer is not properly connected to the network, then it may affect the transmission between the printer and the network. Due to faulty transmission, the printer may not be able to take out the printout correctly.
For efficient operation of the printer, you should keep your printer driver updated. If the printer drivers is outdated, it will compromise the quality of the print and can cause printing of horizontal lines.
Dell Printer Print Horizontal Lines – How to Troubleshoot?
There are a few ways that will help to troubleshoot the problem of the Dell printer print horizontal lines.
Make Sure the Media is Compatible and Correctly Set
Whether you own a Dell 2350d printer or any other model, incompatible media can cause print quality issues. This can be solved by setting the media type on the printer’s front panel.
● Firstly, press the menu tab.
● Now, press the right arrow unless the paper menu reflects.
● Choose the select option.
● Again continue by pressing the right arrow until Size/Type reflects then choose Select.
● Then, on display, select source will appear.
● Choose again the right arrow, till the correct source appears, and then continue with Select.
● The size will be displayed below the source name.
● Now, press the right arrow till the type comes on the screen, and press select.
● Keep pressing the right arrow unless the correct type appears, then press select.
● Lastly, submitting changes will display.
Shake and Reinstate the Toner Cartridge
Shaking the toner can improve the quality, as it redistributes the cartridge, especially when it is empty. To redistribute the toner, one can:
● Remove the toner cartridge from the device.
● Shake the cartridge after holding it over a paper to grab any loose toner.
● Now, again insert the cartridge.
One can replace the cartridge if required. Yet, ensure the toner cartridge is new or works perfectly fine.
Clean the Charge Roller
The charge roller that is loose or contains contaminations may cause print quality issues. One can clean the roller by following these simple steps:
● Switch off the printer.
● Remove the drum and toner after opening the front cover.
● Press and hold the tab on the drum located below and left of the cartridge handle. To separate the drum and toner, pull off the blue plastic toner cartridge.
● Now, clean the roller with a dry cloth or tissue, and also situate the beige charge roller on the imaging drum.
● Then, insert the cartridge into the drum and insert the assembled unit into the printer.
Restore the Imaging Drum
The standard drum unit has the potential to print 10,000 pages. The imaging drum of your Dell printer will face wear and tear in the process. However, many Dell printer models have sensors that indicate when you need to change the drum unit.
The wearing and tearing of the drum will cause printing mistakes. Therefore, replacing it will be the best option. You can check your Dell Color Laser Printer Model 3000cn/3010cn/3100cn by taking the following action if it is printing black horizontal lines.
● Print the four 20% toner test prints from the printer.
● Check the toner test prints, in case it shows one of the print defects. Contact the team to assist with the device.
● When all four prints show defects, one must remove the imaging drum cartridge and clean the contact points properly.
● Now, print the black 20% again, and switch off the printer when the printer begins to come out from the printer.
● Smoothly remove the half-printer page from the printer and now check if the problem begins again on part of the page that does not appear out from the fuser unit.
● For instance, when the problem happens on part of the page that does not come out of the fuser. Then, remove the drum cartridge and check the bias transfer roller.
● In case the BTR is damaged, contact the support team soon for assistance.
Conduct a Stop Test
Stopping the paper part via the printer can help to know where the problem is happening. You can take the following action for your C3760dn/C3765dnf, S3840cdn/S3845cdn Dell printers.
● Firstly, open the rear door.
● Now, print a one-sided page.
● Soon, when the paper starts coming out from the printer, switch off it, which will stop the paper part from coming out by the fuser unit.
● Then, open the front part of the printer and remove the toner and drum.
● Check the paper that has been printed but does not come out from the unit.
● For instance, if the problem can be seen before the fuser unit, replace the toner first and then the drum.
● However, still the issue arises, one should contact the support team for guidance.
Update the Dell Printer Driver
The bugs can cause faulty printouts. Thus, keeping your printer driver eliminates the risk of bugs. With the help of an updated Dell printer driver, you can eliminate the irregularities occurring in your printing including the horizontal lines. So, you can prefer manual or automatic updates, but doing it regularly will help you to avoid any problems.
If you follow all these steps and do not solve your problem, contact Dell Support
Frequently Asked Questions
Can paper quality be the reason for Dell printer print horizontal lines?
Yes. If, in the printer media setting, you have not chosen the right paper thickness and type, then your Dell printer will print the pages with horizontal or vertical lines.
How to fix the Dell printer print horizontal lines?
You can take the following action to fix the issue of horizontal lines in your Dell printer:
● Cleaning print head.
● Cleaning the charge roller.
● Replace the cartridge.
● Update the printer driver.
Can shaking the cartridge solve the horizontal issue on the Dell printer?
Sometimes, yes, shaking the toner can improve the quality, as it redistributes the cartridge, especially when it is empty. One can remove the toner cartridge from the device and then shake the cartridge after holding it over a paper to grab any loose toner.
Should I replace the cartridge to solve the horizontal band issue on the Dell printer?
If the countermeasures are not working, then you must replace the cartridge to prevent the horizontal lines problem due to your Dell printer. Ensure to fit it right. Replacing the cartridge will surely eliminate the horizontal line issue.
Does updating printer drives helps in resolving horizontal line issue?
If your Dell printer driver is outdated or faulty, it will cause miscommunication between your printer and computer. It will ultimately result in faulty printouts, including horizontal bands. Thus, it is safe to keep the printer driver updated.
How do I fix black horizontal lines in my Dell printer?
The potential cause of black horizontal lines can be a dirty drum unit. Thus, you can fix the black horizontal lines in your Dell printer by cleaning or replacing the drum unit.
Read More