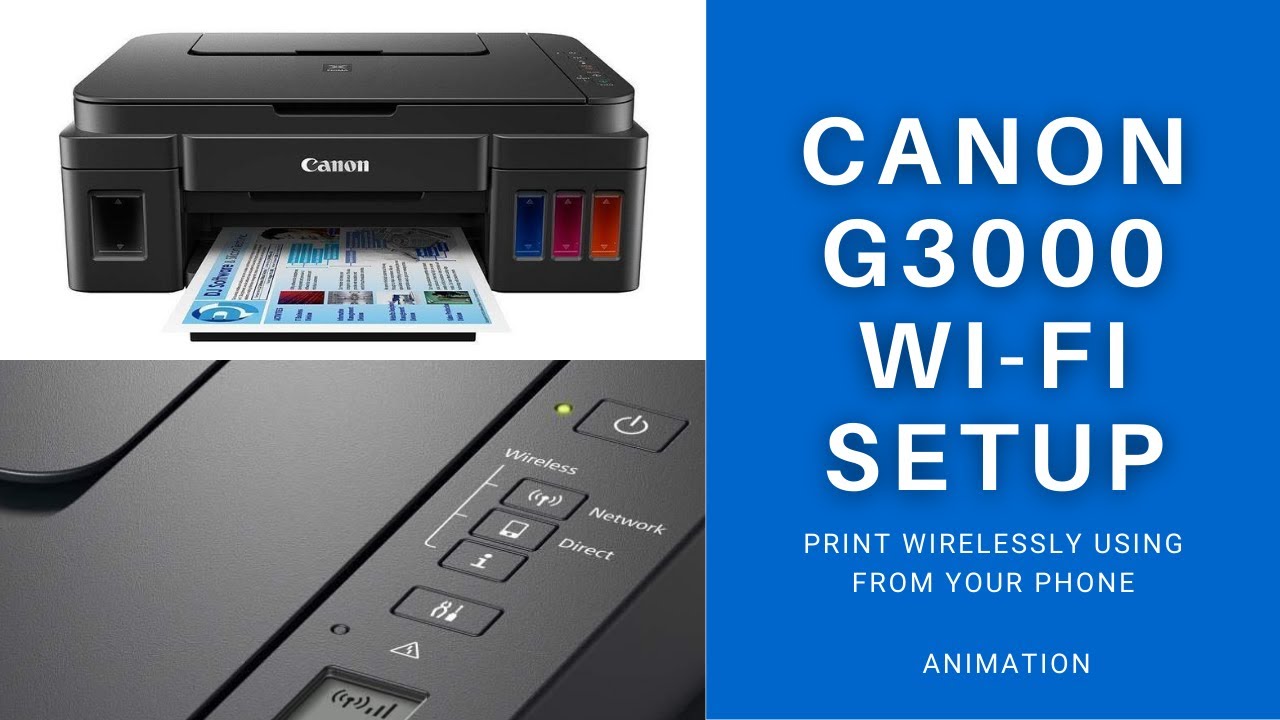
Canon Pixma G3000 is an all-in-one printer that is specially designed for printing high-volume documents at a very low cost. You can use this printer for printing, scanning, and copying files or documents. To use the printer you have first to complete the setup process. The best method for the setup is to connect the printer wirelessly. Most people rely on the Canon Pixma g3000 wifi setup process for fast and reliable results. Canon Pixma G3000 supports wireless connection in which you are given access to connect the Printer wirelessly with your computer or PC or phone, without the need for a router. The mode of connecting the Printer wirelessly to the device is called Access Point Mode. Here, we will study the procedure to set up the Canon Pixma g3000 wirelessly in an access point mode. Make sure that you have an active internet connection while connecting the Printer with the device wirelessly.
Table of Contents
ToggleCheck the Compatibility for Canon Pixma G3000 WiFi Setup
Various devices are compatible with this Canon Pixma G3000 WiFi setup Printer. Therefore, you can connect any of these devices depending on your operating system, to access the printing and scanning services. Thus, go through the list below:
- Operating Window with only 32 bits
- Windows 10
- Windows 10 x64
- Windows 7 x64
- Windows 7
- Windows 8.1
- Windows 8.1 x64
- Windows 8
- Windows 8 x64
- Windows Vista
- Windows XP
Android
- Android 4.4
- Android 4..3
- Android 4.2
- Android 4.1
- Android 4.0
- Android 2.3
Mac OS
- OS X Lion v10.7.5
- OS X Mavericks v10.9
- OS X Mountain Lion v10.8
- OS X Yosemite v10.10
- Web browsers-Safari 8, Safari 7, Safari 6, and Safari 5
IOS
- iOS 8.0
- iOS 7.1
- iOS 7.0
- iOS 6.1 (*2)
- Windows RT
- Web browsers – Internet Explorer 11 and Internet Explorer 10
You can use all the devices with the above specification to connect with the Printer and perform the Canon Pixma g3000 wifi setup process. After the setup is complete, you can then access the services of the Printer and can use it for office and home purposes easily.
Related: Canon MG3122 Wireless Setup
How to Unbox and Prepare for Setup of the Canon Pixma G3000 Printer?
Follow the steps below to perform the Canon Pixma G3000 wifi setup:
- First of all, unpack the carton in which the Printer is packed by removing the tapes.
- Take the Printer out of the Carton, and remove its protective tape also. Carefully remove the tapes of the Printer which may not cause any damage to the parts.
- Open the cover of the cartridge by grabbing the knob on the left side.
- On the left side, place the ‘C’ cartridge. C here means color.
- Open the cover of the cartridge by grabbing the knob on the right side.
- On the left side, place the ‘B’ cartridge. B here means Black.
- Close the cartridge by pressing it in the downward direction.
- Go to the Left-side and locate and push the joint button
- Open the cover of the left ink tank. Remove the cap of the tank and keep it on the cap holder of the upper tank.
- Now, open the package of the blank ink and take it out. Place the ink accurately in the slot.
- Remove the cap of the ink bottle before placing it.
- In the same way, place all the ink in their corresponding ink tanks.
- After placing all the ink, close the cap of the tank and then close the tank cover.
- Check for the position of all the inks in their ink tanks.
- Now, connect the printer with the Power source to start it, and for connecting it with the device. Then proceed for the canon pixma g3000 wifi setup.
- Next step, turn ON the printer.
- Now, load the papers into the paper tray successfully.
Process for Loading the Paper in Canon Printer
To load the papers and check the success of the canon pixma g3000 wifi setup, perform the following steps:
- Firstly, open the support that is provided for the papers in the Printer.
- Now, slide the right guide towards the right end of the Paper Support
- Now, insert the A4 size sheets in the paper tray properly.
- Slide the paper guide back again towards the side of the papers to give them proper support.
- Now, open the output tray carefully.
- Now, give the command to check the success of the canon pixma g3000 wifi setup.
- If the printing command works from your device and the Printer prints the file successfully, then your Printer wireless setup is successfully done.
Thus, the above procedure will help you to complete the Canon Printer Setup successfully, but if you will not take some preventive measures there is a possibility that you may encounter some error while proceeding with these steps.
Preventive Measures For Setup Of Canon Printer G3000 Wirelessly
These are the following preventive measures while performing the Canon Pixma G3000 wifi setup. These are:
- Make sure that you have an active internet connection while undergoing the setup process.
- Make sure that you connect your Printer and the Device with the same network for successful results.
- Make sure that your device is compatible with the Printer to connect it successfully with the device wirelessly.
- Check that your device supports these configurations, including IEEE802.11n (2.4 GHz), IEEE802.11g, or IEEE802.11b.
- Always use a network that is secure with some protective password.
- Choose the options appropriately while setting up the connection.
- Check for the corresponding router functions, device configuration, security settings, and other configurations depending on your device settings.
- Make sure that your device is also running with a high-speed internet connection and is connected successfully with the router.
How to Download Full Driver & Software of G3000 Printer?
Downloading the driver and software helps the printer to work well with the computer system. Hence, to download the full driver for your Canon Pixma G3000 printer on your computer, go through the mentioned steps.
- Firstly, visit the Canon official website in your default web browser.
- Go to ‘Support’ located at the top right corner.
- Tap on ‘Search’ then type your printer model as ‘Pixma G3000.’
- Click on ‘Driver’ and a list of drivers & software downloads will be available.
- Choose your preferred driver and click on ‘Download.’ Although the most suitable driver and software are the top ones on the list.
- After downloading, Double-tap on the downloaded .exe file. It will start decompressing and the screen for setup will be shown.
- Hence, follow the on-screen instructions for installing and performing all the mandate settings.
Connecting Canon Pixma G3000 Printer to a Wireless Connection
To connect your Canon Pixma G3000 WiFi setup printer to a network and the computer, you can choose any method from Cableless setup or the WPS setup. Both methods are good, thus, depending on your system preference you can choose the method and follow the steps provided.
Cableless Setup without operating Wireless Router
Here you will get to know the steps for connecting the Canon Pixma G3000 printer to a computer or smartphone without setting up any additional wireless router. However, this connection may take some time and an internet connection can also become unavailable temporarily during the setup process. Also, this setup won’t work in Chrome OS and Windows RT. Thus, by keeping these things, we follow the procedure.
- Firstly, ensure that your printer is ON.
- If on the printer WiFI starts flashing up then Press the ‘stop’ button
- Press on the WiFi option and hold it until the light blinks..
- Therefore, click on the color option and yet again on the WiFi tab.
- Check that the Wi-Fi light is blinking quickly. Additionally, the Lamp is lit.
- Lastly, go back to the screen of the application and follow the on-screen instructions on the computer to proceed with the entire setup.
Connect with a WPS-Compatible Wireless Router
- Firstly, make sure that your Canon Pixma G3000 is switched ON. On switching ON, the lamp on the printer will flash.
- If the lamp on the WiFi icon is also ON, then click on Stop.
- Now ensure that the tab on the wireless router is ready to be pressed.
- Afterward, on the printer, click and hold the WiFi tab till the light starts flashing up.
- Tap on the ‘Black’ tab and then on the WiFi tab.
- Ensure that the WiFi button starts lighting up quickly and the lamp is also ON.
- Within 2 minutes, click and hold the wireless router button.
- In the end, check the WiFi tab and the lamp is lit.
Hence, by this, your setup is completed and now the printer is ready to perform the printing and scanning tasks.
Connect to a Network by WPS Pin Code Method
If you are unable to connect by using the WPS-compatible method, then you can prefer connecting to a network by using a WPs Pin Code Method.
- On the printer, tap and hold the WiFi tab and release the tab as soon as the WiFi light flashes.
- Again press the WiFi button and the WPS Pin on the page of network configuration data will print.
- On the printer, Click and hold on the ‘Stop’ tab till the Alarm lamp is flashing up at least 20 times. Hence, on the 20 flash, release down the ‘Stop’ tab.
- The printer will automatically print a network configuration page.
- After this, follow the instructions displayed on your computer screen for setting up the WPS Print.
- To set up a WPS pin on your computer or smartphone, follow the instructions available on the Network Configuration page.
- Lastly, after following the instructions, ensure that the WiFi lamp on the printer is lit.
If you follow all steps correctly, your network setup by using a WPS pin is completed. Hence, this printer is ready to perform its task by taking the printer commands from the computer.
What is the Process to Connect Canon Pixma G3000 Printer with WiFi?
To connect your Printer wirelessly with the WiFi, you need to go through some series of steps. On victorious connection, you will be able give order to the Canon Printer from the computer and can also make printing and scanning accordingly. Follow the steps below to perform a canon pixma g3000 wifi setup.
- Turn ON your Printer. To check the power of the Printer, examine that lamp A is lit.
- Now, press the button that shows the Wi-Fi signal, and hold this button till the light in the lamp flashes.
- Now, click the color button.
- Click on the Wi-Fi button to continue with the canon pixma g3000 wifi setup.
- Check the quick flashing of the Wi-Fi lamp.
- Now, check if the light corresponding to the ON lamp is also lit or not.
- Now, go to the app screen and follow the instructions.
Frequently Asked Questions (FAQs)
What are the system requirements for the Canon Pixma G3000 WiFi Setup printer?
The Canon Pixma G3000 printer is compatible with the Windows XP SP3, Windows Vista SP2, Windows 8.1, Windows 8, and Windows 7 that are 32-bit only. For Mac OS X Lion v10.7.5, OS X Mavericks v10.9, OS X Mountain Lion v10.8, and OS X Yosemite v10.10.
For iOS- iOS 6.1 (*2), iOS 8.0, iOS 7.1, and iOS 7.0. For Android devices – Android
Android 2.3, Android 4.0, Android 4.1, Android 4.4, Android 4.2, and Android 4.3.
What is the power consumption of the Canon Pixma G3000 Printer?
The Power Consumption of the Canon G3000 printer in standby mode is 0.3W. When in connection with USB to PC then the consumption is 1.7W and at the time of copying it is 14W.
Why is my Canon Pixma G3000 printer not connecting to the WiFi?
Here are some ways that you can apply to reconnect your printer again to the WiFi:
- You can unplug the canon printer for 60 seconds, then plug in back.
- Unplug the router for 60 seconds and plug it back and wait for the connection.
What are the procedures can I use to connect my Canon G3000 printer to a network?
The process that can help you to connect your Canon Pixma G3000 printer with a network is via a Cableless setup that does require wireless router, with a WPS compatible wireless router and with the WPS Pin Code connection method.
Check: Canon Printer Support