Because of the multiple quality features, the Canon Ivy mini photo printer is in demand. People use it in offices, in households, and for personal use. If you are planning to purchase one, you also need to learn the setup of it. So, if you are considering the Canon Ivy Mini Photo Printer setup, don’t worry; here is the essential information.
Canon introduced the Ivy Mini Photo Printer, which is easy to use. You can carry it anywhere as it is portable, compact, and easily fit into the bags. You can also click the photos and print them at once. Additionally, it is cost-effective, saves energy, and produces high-quality prints and pictures.
Initial Steps of Canon Ivy Mini Photo Printer Setup
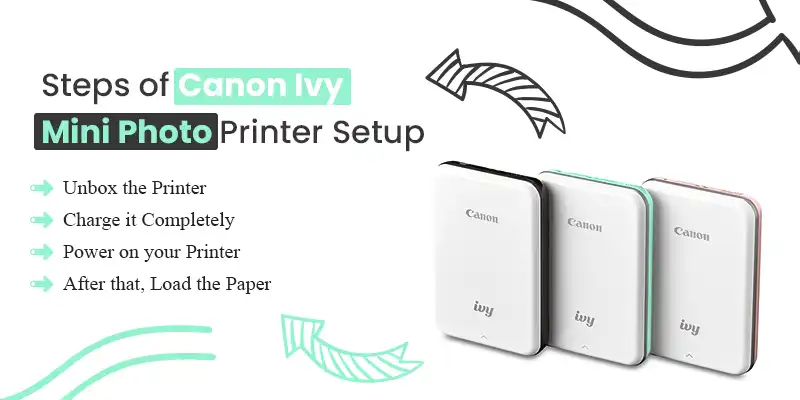
The user must know some crucial points about the Canon Ivy mini photo printer setup. Always make sure that your printer is fully charged. To start your Canon Ivy mini photo printer, you need to check out these steps:
- Unbox the printer
- Charge it completely
- Power on your printer
- After that, load the paper
Step 1: Unbox the Mini Printer
First, unbox your printer and check whether it has all the components inside it and if nothing is missing. Also, ensure that the packaging is not damaged.
Step 2: Charge your Canon Printer
Users must know that the printer uses a built-in battery, so fully charge it once you use it. When you plug in your printer for charging, the red light will flash, showing the charging status. The green light will show that your printer is fully set.
Steps for charging your printer with the USB cable.
- Insert the smaller end of the USB cable into the printer and the other end into the chargeable USB adaptor.
- The charging light will turn red, indicating the charging.
- Once it is fully charged, the light will turn green.
Step 3: Power ON Your Canon Mini Photo Printer
When you are doing the Canon Ivy Mini Photo Printer setup, the next step is to power it on.
- Tap and hold the power button until the LED light blinks two times in green. This will indicate that your printer is turned on now.
- When your printer shows the white light, that means your printer is ready to use.
- When you complete your print, power off your printer by pressing the power button for 2 seconds.
- However, your device will automatically turn off when idle for 3 minutes. You can set the timer according to you (3 minutes/ 5 minutes/ 10 minutes).
Step 4: Load the Paper in Your Canon Ivy Mini Printer
To complete the setup of your Canon Ivy Mini Photo Printer, the last step is to load the paper so that you can start printing. Read the steps below to help you easily load the paper in your Canon Ivy Mini Photo Printer and finalize your setup.
- First, remove the printer’s top cover by sliding it toward the arrow.
- Now open the single pouch of the sheet paper, which contains 10 sheets and a blue smart sheet.
- Then, place the bright blue sheet at the bottom with the photo and ten paper sheets on the top into the paper compartment.
- Make sure that all logs and bar codes are facing down.
- Place the top cover back onto the printer. Ensure that it clicks when you close the cover.
- The printer will send the blue smart sheet automatically before the first print.
Canon Ivy Mini Photo Printer Setup With Mobile
Now, you can easily print anytime, anywhere. Connect your Canon Ivy mini photo printer with your mobile, click the picture, and print immediately. Canon Ivy mini photo printer supports Android and iOS devices. Along with that, you can print the picture which is already stored in the device and also can draw on the image. Just remember Bluetooth must be enabled on your mobile to print. Follow the Canon Ivy Mini Photo Printer setup instructions with the mobile.
Download the App
- First, download and launch the app.
- Go to the app store (iOS)/ Google Play store ( for Android) And search for the Canon Mini Print App.
- Read out the instructions and download the app to your mobile device.
- When the app is installed, tap its icon to launch it.
- Now read the End User License Agreement and click “Accept” to continue.
- Check out the process and instructions on the screen and swipe next.
- Lastly, click the “Done” button, and the main screen will appear on your mobile phone.
Now Configure the App to Your Mobile
- Go to the Bluetooth settings and enable Bluetooth.
- Now, on the main screen of the Canon Ivy Mini Photo Printer, press the “plus” button to choose your device.
- After that, your mobile device will search for the nearby active Bluetooth network.
- Select the Canon Mini Printer when it appears.
- Now, the printer pairs with your mobile device successfully.
- The printer icon on the upper right corner of the main screen will have a green symbol next to it.
- Do not forget to load the papers into your printer.
Instructions for Loading Paper into the Canon Ivy Mini Photo Printer
- To avoid paper jams or printing errors, only load 10 ZINK photo paper sheets and 1 Blue Smart sheet at one time in your Canon Mini photo printer.
- You can purchase the additional photo print papers within the Canon Mini Print App. Just click on the “Buy Papers” in the main menu.
- If you are facing a paper jam in the printer, turn OFF the printer and then turn it ON. It will automatically clear the paper jam. Do not pull the paper out.
- Also, do not pull the paper when the printer is printing.
- Handle the photo paper carefully and ensure it is clean and not damaged because it may cause print errors.
- To maintain the quality of the paper, do not expose it to direct sunlight or moisture where the humidity is out. Also, please do not open the new pouch of the form until you need to load it. Read the suggested conditions printed on the bag carefully.
About the Blue Smart Sheets
- When loading the papers into the printer, always load from the same pouch for optimal print quality because each Blue Smart Sheet is specifically tuned with the documents within the bag.
- The printer will automatically send the blue smart sheet before the first print to clean the printer and optimize print quality.
- Only discard your blue smart sheet after printing all 10 sheets of photo paper.
- If you find the low print quality, you can reuse the blue Smart Sheet if the paper is still from the same pouch.
- If you use the blue Smart Sheet from another pouch, it may reduce the print quality.
What Does the LED Flash Indicates?
| Status | Mode LED | Status LED |
| Power On | Tap and hold the power button | White > white flashing |
| Stand By | # Device is not connected to the app # Device is connected to the app | #White flashing # White |
| Power Off | Tap and hold the power button | No light(off) |
| Processing Blue Smart Sheet | When the device is loading the Blue Smart Sheet | Yellow> White> Magenta > White > Cyan> White( Looping) |
| Printing Photo | When the device prints a photo | Yellow > White > Magenta > White> Cyan > White(Looping) |
| Blue Smart Sheet Error | When the device detects the error | Blue Flashing |
| Get Ready for Print | Preparing for printing | White glowing |
| Paper Jam/ Cover Open | If the printer cover is open or facing any paper jam | Red Flashing |
| No Paper | When there is no paper in the tray, and you tap for the print. | Red Flashing |
| Firmware Upgrading | When the device is updating firmware. | White glowing |
| Low Battery | When the printer’s battery level is low | White> Red (flashing) |
| Temperature High | When printer temperature is high | Red |
| Printer Head Cooling | Let the printer head temperature cool down before printing | Cyan (glowing) |
| Temperature Low | When the printer temperature is too low. | Cyan |
Know the Features of the Canon Ivy Mini Photo Printer Before Setup
| Charging source internal rechargeable battery | 500 mAh Li-Polymer 7.4 V |
| Charging speed | 45 minutes (full charge) |
| dimensions | 4.7”(L) * 3.3”(W) * 0.8”(H) |
| Weight | 177 g |
| Connectivity Bluetooth | 5.0 |
| Compatibility OS | iOS 12.0 or above and Android 6.0 or above |
| Print technology | ZINK |
| Print resolution | 313* 512 dpi (dots per inch) |
| Borderless printing | yes |
| Compatible paper Canon ZINK Photo Paper | ZP-2030-20 (20 sheets)ZP-2030-50 (50 sheets)ZP-2030-2C-20 (20 sheets)2” *3”/Peel- and -stick-back |
| Paper capacity | 10 sheets of ZINK photo paper and 1 blue Smart Sheet |
| Memory | 512MB |
| Power adaptor Output power | 5V 2.25A |
| Automatic power-off | 3 minutes / 5 minutes ( user can change it) |
Note: All the specifications can be modified without notice. Also, try to charge your Canon Ivy mini photo printer only with the USB charging adaptor. If you charge it with the laptop USB port, there may not be enough electric power.
If you need more help, please get in touch with Canon Support
FAQs
How do I connect my Canon Ivy Mini printer?
Here are the steps to connect your Canon Ivy Mini printer.
- First, ensure you have downloaded the Canon mini print for your device (Android / iOS).
- Now, switch ON your printer, and the status LED light will turn ON.
- After that, open the Settings option and enable your Bluetooth.
- Press the plus button under “Choose your device.”
- Your device will automatically search for nearby active Bluetooth devices.
- Check out the listing and tap on the Canon Ivy mini printer to pair.
Why is my Canon Ivy mini printer not connecting?
There might be many reasons for the disconnection of your Canon Ivy mini printer.
- Keep the printer’s battery charged more than 50% to avoid disconnection problems.
- Update the firmware to the latest version.
- Also, you might need to reset your printer for the speed.
- If you connect on mobile, there might be a network problem. It would help if you reconnected via Bluetooth.
How do I add photos to my Canon Ivy Mini Print App?
You can add photos to the Canon Ivy Mini Print App. Follow this step-by-step process-
- First, send a photo in the gallery of the device you are using.
- After that, send the photo to the app by pressing the Mini print icon.
- Now, you can edit and print it.
- Besides this, you can try another option: click “Print to Canon” to send the photo to the print queue.
Does the Canon Ivy Mini Printer need ink?
The Canon Ivy mini photo printer does not need ink for printing. The ZINK technology (zero ink) contains colourful dye-based crystals embedded inside the paper. Also, you do not need to worry about fingerprints.
How do I pair my Canon Ivy mini printer to my computer?
To pair your Canon Ivy mini printer to the computer, go to the “set up” menu. After that, select “wireless LAN setup.” Choose your wireless access point and type your password.
Lastly, tap the “end set up,” and the blue light will start flashing solidly. Your printer is now connected to the computer.
Does the Canon mini printer work via Bluetooth?
Yes, you can print from the Canon Ivy mini photo printer using a Bluetooth device. Download the app onto your mobile phone, turn on the Bluetooth button, and wait for the network in the list. After that, pair your printer with the portable Bluetooth and start printing.
Is the Canon Ivy mini printer compatible with the iPhone?
Printers are playing a tremendous role in the technology world. Now, you can print with your Android as well as iPhone. Canon IVY2 mini photo printer supports the iPhone. It is compatible with other iOS & Android devices as well.
How do I reconnect my Canon printer to Wi-Fi?
To connect your printer to Wi-Fi, turn on your printer and hold the Wi-Fi button until the flashlight is on. Now, click on the WPS button on your router, and you will see a light flashing next to the Wi-Fi button. Your printer is directly connected to the Wi-Fi.
How long does it take for a Canon mini printer to charge?
The Canon Mini printer is a portable photo printer. That is to say, it runs on a battery. The average time it takes for its battery to charge completely is 90 minutes (given the battery is relatively healthy).
Read More: