Fix Canon printer head alignment – What Causes The Printer To Show The Error
If the pages you are printing on your Canon printer are coming out distorted it is most likely due to the misaligned printheads or cartridges. Following are a few causes of a misaligned cartridge or printhead.
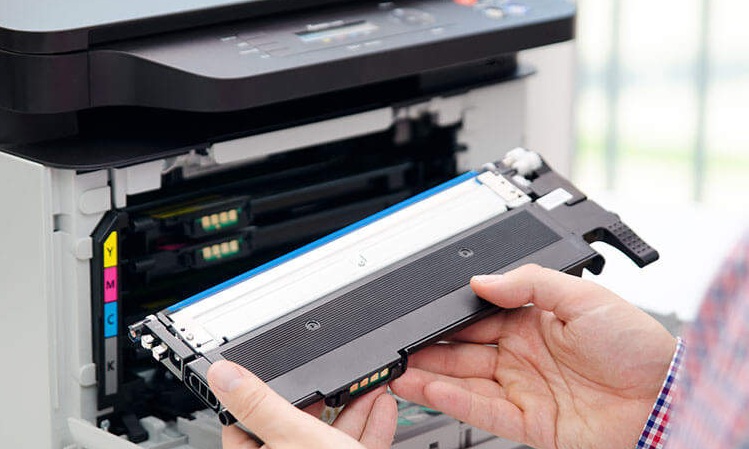
Cartridge Placed Wrongly
If you have recently replaced an old toner/ink cartridge with a new one, it is a possibility that this ink/toner cartridge does not fit in properly. This causes the print heads to slip from their position resulting in bad-quality printing.
Insufficient Ink Or Toner
Although this insufficiency of toner or ink does not directly cause the print heads to act up, in some cases, it can cause your Canon printer to show ‘Alignment Errors’.
Faulty Print heads
Check for impaired print heads. Broken or even soiled print heads can result in ‘Alignment Errors’. Sometimes, the printer cannot assess or process what the actual issue is, hence, the ‘Printer head Alignment Error’.
Related: HP Officejet Pro 8610 Missing Or Failed Printhead
Fix Canon printer head alignment – Resolve The Canon Printer Alignment Issue
If your printed pages come out disfigured, you should check the print heads of your Canon printer. Accumulated or diffused ink all over the sheets is a sign that the print head needs to be aligned. The problem could be anything, ranging from ink or toner inadequacy to an impaired print head.
If you’ve ever had to wonder how to fix Canon printer head alignment, you ought to check these methods. The first few of these points are easy to carry out and require only the basic know-how.
Clean The Print Head
Take out the cartridge and dust it off thoroughly. This would help you with the ‘Alignment error’ on your Canon Printer.
Uninstall And Reinstall The printhead
If the printhead is not placed in its precise spot, it won’t function, which in turn will result in your Canon printer’s ‘Alignment Error’. The easiest way out is to remove it and re-install it, this will most certainly help you Fix Canon printer head alignment.
Fixing The Alignment On the Canon Printer Manually
Go to the Printer driver setup menu and open it.
You will see a maintenance tab, on it, there will be a custom settings section. Click on here. The Custom Settings dialog box will open.
Thereon, change the head alignment setting to manual. For this, there will be one ‘Align heads manually’ check box. To switch to the manual setting, check this box.
When making these changes, make sure that the Canon printer is ‘On’ and is connected to the Computer. If not, the computer will show an error message since it cannot collect the status of the printer. To correct this, click ‘OK’ to show the most recent settings on your computer.
A confirmation message will appear, Click ‘OK’ on the dialog box. The settings will be applied.
Next, on the Maintenance tab you will find ‘Print head alignment’, Click on the option, and a ‘Start print head alignment’ box will open.
Now load 3 sheets of A4 size paper or letter size papers into the lower cassette.
The next step is to execute head alignment. Ensure the Canon printer is on and go ahead with the ‘Align print head’. Click this option.
Once, done with this step, a message will appear displaying instructions to be carried out. Follow the instructions and move ahead with the process.
Fill in the numbers of the patterns with the least number of streaks in the associated boxes.
If it is difficult to choose the best pattern, select the patterns with the least noticeable horizontal and vertical streaks.
A message will be displayed, confirm it, and click ‘Ok’.
Repeat the process two more times on the sheets that are left.
In the end, a final confirmation message will be shown, click ‘OK’ to accept. This adjusts the head position
If you want to check the current setting or print, open the ‘start print head alignment’ dialog box and click the option ‘Print Alignment Value’.
also, check how to Fix Canon Mx922 Print Head Errors
Fix Canon printer head alignment Automatically
We are also giving out detailed information on how to fix Canon printer head alignment automatically.
Make sure the power switch to the printer is ‘On’ and load some papers in the Rear tray. The paper could be A4-sized or letter-sized.
Go to the printer properties dialog box, open it, and adjust the print head pattern from there.
Further, open the ‘Maintenance tab’ and select the option named ‘Print Head Alignment’
A message will be displayed, with options such as, ‘Print Alignment value’, ‘Align Print Head’, and ‘Help’. Click ‘Align Print Head’
The print head alignment will be printed, it takes about 4 minutes to print.
Greetings, I am Martin! I am a Tech Specialist and a Blogger. As a technology fanatic, I am enthusiastic about all things related to internet devices and how they are transforming our lives. My years working in the tech industry have helped me gain extensive knowledge of the latest internet devices. I am here to provide my readers with informative and engaging articles on the latest updates, innovations, and trends in the world of internet devices. When I'm not trying out the latest tech products, you'll often find me on a hiking trail, enjoying the breathtaking outdoors.