The Canon TR4720 is one of the versatile all-in-one inkjet printers that are capable of print, scanning, copying, and faxing. This is a wireless printer that is best for home use and helps in printing from your computer. But for effective utilization of the printer, one needs to learn the Canon TR4720 setup first.
To understand the complete features of the printer, you need to gain a little information about your Canon tr4720 printer. Besides this, you should be aware of the method of setting up the printer properly. If you are confused about how to complete the Canon tr4720 printer setup, check out the step-by-step process given below. By following these steps, you will be capable of easily connecting your printer to different devices.
Compatible Devices for Canon TR4720 Setup
| OS | Compatibility |
| Windows | Windows 8.1, Windows 10, Windows 7 SP1. |
| Mac | macOS 10.12.6 – 10.15 |
| Mobile operating system | iOS, iPad, Android |
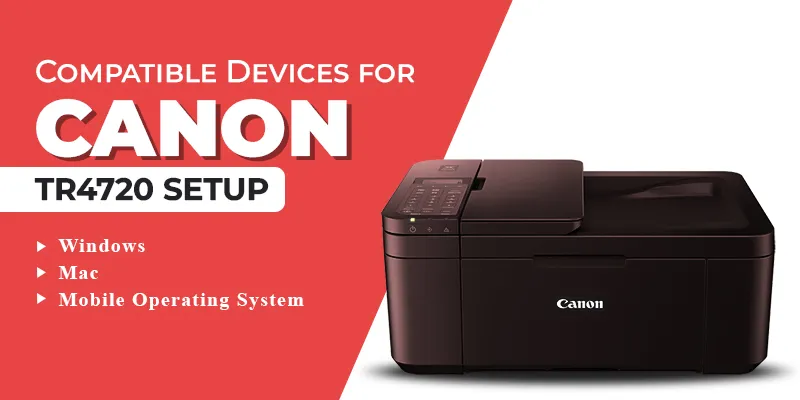
Note: Canon Pixma tr4720 is also compatible with the Chromebook.
Initial Steps for Canon TR4720 Printer Setup
Once you purchase the Canon tr4720 printer, the next step is to assemble the essential components. The user must be aware of the essential steps to make a fine start of the printer. Check out these steps and start setting.
- Start with Unboxing- To make a complete Canon tr4720 setup, start your process by unboxing the printer. Check if the printer has all the components inside it and the packaging is not damaged.
- Remove the orange tap– Next, remove the orange tap from the top of the printer. However, the location of the orange tap may vary.
- Turn ON the printer– After that, look at the back side of the printer and connect the power cord there. Press the ON button which is on the front corner side of the printer. Select the language and click OK. Also, select the further options which are showing on the screen.
- Install the ink cartridge– Now install the ink cartridge inside the printer by lifting the top cover of the printer. Install the colored and black cartridge in the correct slot. Make sure that it is properly installed and well-settled now. Choose the update and click on OK.
- Load paper- The next step is to load the paper inside the printer. Use plain LTR or A4 size paper, mention the size type, and click OK.
How to Connect Your Canon Printer on Windows Device?
Now, the next step is to connect your Canon tr4720 to the computer to start printing. You can connect the printer to the computer:
- Through USB
- Via wireless connection
- Via Wifi
Attach Through the USB Connection
- Firstly, turn ON your Canon tr4720 printer.
- Connect the provided USB cable to the Pixma tr4720 and the device.
- After that, go to canon.com and download the suitable driver from there.
- Then, install the full features of the Canon tr472 driver, and your printer is now connected to your computer with the help of a USB device.
Canon tr4720 Printer Setup via Wireless Connection
You can also start printing by connecting your Canon printer via a wireless connection. So do not waste time, just follow the steps and this will help you to start printing wirelessly.
- First of all, switch ON the printer.
- Check out the printer’s control panel.
- Touch the wireless icon there.
- Then, download the driver for a wireless connection that suits to Canon Pixma tr4720.
- Start the installation of the driver.
- Tap the Canon Pixma tr4720 wireless setup wizard.
- Now, connect your printer to the wireless network.
- Take a test printing to check if it is connected properly or not.
How to Connect the Canon Pixma tr4720 with WiFi?
Every home and office has wifi. Therefore it becomes necessary to learn how to execute Canon Pixma tr4720 setup to a wifi. Follow these step-by-step processes and your printer will easily catch the network.
- If you have not still turned ON your printer, then switch ON it first.
- Secondly, confirm that your Canon Pixma tr4720 is in the wireless setup mode.
- If it is not in the wireless setup mode then, check out the WiFi button on the printer and press that. Also, hold the button for at least 5 seconds.
- The printer will show you all the available wifi networks on the screen.
- Click on your wifi network.
- Type the correct Password for your Wi-Fi
- Lastly, tap on the “Connect” button.
- Now, your printer is successfully connected to wi-fi. You can start printing wirelessly.
Are You Facing Trouble in Connecting the Printer to a Wireless Router?
If you are trying to connect your printer to the wireless router but finding difficulties in it, you should directly contact the Canon support department without wasting time.
Just need to remember some essential tips.
- Ensure that your printer and the wifi router are near each other.
- Check if your printer is not set to airplane mode.
- Also, type the correct password.
Steps to Download the Driver in the Canon tr4720 Printer For Windows
To complete the setup of your printer, downloading a suitable driver is an essential step. Many users find it difficult and struggle with this question of how to download the driver in the Canon printer. Here is the answer to this question which will resolve your confusion.
- To download the driver, open the Windows computer.
- Find out the OS version.
- Check if the OS version is updated or not, if not then update it first.
- Now, go to your browser and search for the Canon PIXMA TR4720 driver.
- There you will need to enter your printer model and check out the compatible driver software for it.
- The Canon tR4720 driver download option will display on the screen.
- Click on the Download.
- Wait until the download is complete.
- The Canon tr4720 printer software is downloaded successfully on your computer.
Install the Driver to the PC
- Make sure that your computer and Canon PIXMA TR4720 are connected.
- Then, go to the usa.canon.com/tr4720 driver.
- It provides free downloads for Canon print drivers for Windows 10, 8.1, 8, 7, XP, and Vista.
- Now the next step is to install and set up the printer’s software.
- Attach your Canon PIXMA tr4720 printer with a wireless connection or by USB setup.
- Finish installing the drivers and jump to the printing.
Use USB Cable to Connect Your Canon TR4720 Printer with Mac Devices
To connect your Canon printer to the MAC devices, you need to check out the following steps.
- Switch on your Canon PIXMA tr4720.
- Link the Canon tr4720 printer and your PC to the same network.
- Now, connect the Canon PIXMA tr4720 printer to the USB cord.
- For Mac, visit usa.canon.com/tr4720.
- There you will be recommended the correct print driver for your Canon PIXMA tr4720. Download it.
- Install the full-feature print driver for the printer.
- Finish the Canon PIXMA tr4720 printer setup.
How to Make a Wireless Setup for a Mac?
If you do not find the Canon tr4720 driver, then the following steps will help you to solve the issue.
- Turn ON your Canon PIXMA TR4720 printer as the first step.
- Check the printer Control panel for the Canon PIXMA TR4720.
- Go and select the Wireless menu.
- Use the USB cord to connect the Canon PIXMA tr4720 printer to the computer.
- Download the software which is suitable for wireless connection.
- Launch the installer for this printer.
- Follow the directions that display on-screen for the Canon tr4720 setup
- Next, link the Canon PIXMA TR4720 printer to your wireless network.
- Installing the Canon tr4720 Mac printer driver is the next step.
- To ensure a successful wireless installation, try printing a test page.
Steps to Download the Driver for Mac Devices
- Switch on the PIXMA TR4720 printer device and your Mac system.
- After that, determine the Mac OS version
- Update your Mac OS to the most recent version.
- Go online and look for a Mac driver for the Canon tr4720.
- Write down the model number of your printer and find the direct driver download link.
- On a Mac computer, download the printer driver for the Canon tr4720. Lastly, install the driver.
Wireless-Protected Setup for Canon TR4720
Follow the step-by-step process to connect your Canon tr4720 using the WPS button.
- Check out the printer’s control panel.
- Tap on the wireless button.
- Now, choose the “Wi-Fi-Protected Setup.”
- Select the push button option in that section.
- Press the WPS button on the router.
- After that, go back to your printer’s control panel.
- Click on the “Continue.”
- The WPS setup is successfully done.
Enable Bluetooth on the Canon tr4720 Printer
- Turn ON the printer.
- Go to the Setup option.
- Tap on Setting.
- Choose the device setting.
- After that, select the device user settings.
- Now, click on the Bluetooth settings.
- Choose to enable Bluetooth and your printer will connect to the Bluetooth.
- Take a test printing to check if the printer is connected properly or not.
Paper Media Settings on Canon TR4720 Printer
For the best performance of the printer, you not only need to load the paper but also set it up properly.
- Register the paper size and media type in the printer.
- Go to Paper Settings which display on the printer screen.
- Select the Panel model.
- Look at the home screen and select the “Paper Set” option.
- Choose drawer 1.
- If you want to change the paper size, select it. You can print on A4 or A5.
- The loaded paper size will be displayed on the screen.
- You can also select the paper type such as
- Plain paper
- Glossy
- Semi-gloss
- Matte
- Now, by completing all these options, your paper setting is complete and ready to print.
Canon tr4720 printer supports these sizes of paper:
Custom size – length – 6” – 26.6” and width- 4” – 8.5”
Borderless printing – 4”*6”, 5”*7”, 8” *10”
FAQs (Frequently Asked Questions)
How do I connect my Canon tr4720 printer to wi-fi?
You can connect your Canon tr4720 with the wifi by following these steps.
- Turn on the printer first.
- Now press the wireless/menu button.
- Hold for 2 seconds
- Now the printer is ready to reach the network of the wifi and will connect.
How do I connect my Canon tr4720 to my computer?
You can connect your Canon tr4720 printer to your computer using the USB device. Make sure, you connect the square connector to the printer and the flat connector to the computer. This way you can connect your printer to your computer and start printing.
How do I set up my Canon tr4720 printer to print wirelessly?
If you want to set your Canon tr4720 wirelessly, follow the steps to connect the printer.
- Go to the printer’s control panel.
- Select the wireless icon there.
- Download the driver for a wireless connection.
- Start the installation of the driver.
- Tap the Canon Pixma tr4720 wireless setup wizard.
- Lastly, connect your printer to the wireless network.
How do I install my Canon printer for the first time?
When you want to start your Canon printer, you need to set it up properly.
- Start the setup and do not plug the connector into the socket.
- Now, insert the cartridge.
- Choose the language.
- Load the papers.
- After that, establish a grid and then align the scanner.
- The next step is to install the software.
- Lastly, start printing.
Is the Canon PIXMA TR4720 compatible with Windows?
If you are confused that your Canon tr4720 will be compatible with Windows or not, then the answer is Yes. This printer is compatible with Windows 11. It is also compatible with Windows Vista.
Why is my Canon printer not connecting to Wi-Fi?
There could be multiple reasons why your Canon tr4720 is not connecting to the Wi-Fi.
- Network issue.
- Change in wifi network.
- Wrong password.
- Incompatible driver.
- The wifi board is not near to the printer.
Is Canon PIXMA TR4720 compatible with Chromebook?
If you are using the Canon Pixma tr4720 printer, you must know about its compatibility. Canon tr4720 is compatible with Chromebook. It is also compatible with various OS versions of Windows and Mac.
How do I set up my Canon tr4720 printer to print from my phone?
You can connect your Canon tr4720 printer to your mobile and start printing easily.
- Download the Canon app onto your mobile.
- Go to the Bluetooth setup.
- Notice the instructions given on the screen.
- Attach with the Bluetooth of your phone.
- Now your smartphone and Canon printer are successfully connected.
- Start printing, and scanning from the phone.
More Helpful Guides