Table of Contents
ToggleOperating System Compatibility for Brother QL 700 Setup Process
You need to maintain and check the compatibility of the system before following up with the Brother QL 700 WIFI Setup. You may face installation and activation issues if the device is not compatible with the printer. For compatibility, there are certain requirements that the system needs to fulfill. These are as follows:
- Windows – Windows 10, Windows 8.1, Windows 8, Windows 7, Windows Vista, Windows XP.
- Mac – Mac OS 12, OS 11, 10.15.x, 10.14.x, 10.13.x, 10.12.x, 10.11.x, 10.10.x, 10.9.x, 10.8.x, 10.7.x, 10.6.x, 10.5.x, 10.4.x.
- Linux – Linux (deb), Linux (rpm)
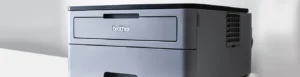
Brother QL 700 Setup – Follow Up with the Quick Guide
To perform the printer setup, you must first assemble the printer and connect it with the active power supply. If you are using the Brother QL 700 printer for the first time, then follow the steps below for its quick setup.
- Unpack the package and take the printer out of it.
- Remove all the protective tapes from the printer and its accessories.
- Check that all the items in the package are in the best state and there is no damage.
- Now connect the power supply to the printer.
- Hold the power button for a few seconds to turn the printer OFF for assembling the parts.
- Open the DK roll compartment by lifting it softly.
- Now, take the spool and guides and keep it in its correct place.
- Now, thread the roll in the slot to make it align within its correct position.
- Close the compartment firmly.
- Now, press and hold the power button to turn ON the printer for Brother QL 700 Setup.
- When you configure the green light next to the editor elite button, release the power button.
- Now, take a USB cable and connect one end of the cable with the printer and the other end with your device.
- If there is a successful connection, then the computer screen will show up in a dialogue box.
- Choose the printer as ‘P-Editor Elite’.
- Click on the option ‘Open folder to view the files.
- Click on the option ‘PLITE 10’.
- It then allows the P-editor lite to start.
You can also perform the connection process using the wireless connection method for Brother QL 700 WIFI Setup. The wireless connection process is highly preferable due to its accuracy and reliable output. Moreover, you can also access the printer remotely using a wireless connection over a network.
Related: Brother MFC-L2700DW WiFi Setup
Download and Install the Driver and Software Package for Brother QL 700 Setup
You can download and install the driver and software package for the effective working of the printer. Driver installation is a necessary step for the Brother QL 700 WIFI Setup and the wired setup also. You may receive failure in the setup process if you skip the driver installation. Follow the steps below to download and install the driver package online with authorized access.
- Connect your system with an active internet connection.
- Now, visit online on the official Brother Printer website.
- Click on the software and driver option.
- Enter the name and model number of the printer as ‘Brother QL 700’.
- Hit the enter key and the screen will show the driver package compatible with your printer.
- Click on the download button next to the driver package.
- Wait for the download to complete and then run the downloaded file to install the drivers for Brother QL 700 Setup.
- The computer screen will display a prompt for the installation confirmation.
- Click on the ‘Yes’ button.
- Go with the flow of the instructions.
- Agree to the terms and conditions.
- Finally, end up the installation successfully using the Finish button.
- If the screen shows the error message during the installation process, then check your internet connection or the device compatibility, or there can be any other issue that requires troubleshooting to resolve the problem.
Brother QL 700 WIFI Setup – How To Connect Brother QL 700 to WiFi?
Brother Printer wireless connection is the best method to connect the printer reliably. You can perform the printing task even from a distant place. Moreover, there is no requirement to check the hardware faults using the Brother QL 700 Setup. Follow the steps below for the wireless connection process over a network. You need to connect both the devices to the same network for connecting the devices.
- When you run the Printer driver, the screen will display three options for the connection process.
- Choose the ‘Wireless Network Connection’ and click on the next button to continue.
- Now, in the next window click on the ‘Brother Peer-to-Peer Network’.
- Click on the Next button.
- If there is an antivirus running on your system, then the screen will show a firewall setting.
- Click on the first option to proceed securely.
- Click on the box next to ‘Check and Confirm’.
- Click on the Next button and the screen will start to process to discover the wireless network.
- Click on the same network name as you connect with the printer.
- Click on the Next button and add the password for your network connection.
- Follow the instruction and keep on pressing the next button.
- Now close the window finally to complete the Brother QL 700 Setup.
You can now check the successful connection by printing the test page. If the test page prints successfully, you can continue with the printing task. Else, follow the troubleshooting process to resolve the problem and again follow the Brother QL 700 Setup process.
Related: Brother 2270dw wifi setup
Troubleshooting and Fixing Brother QL 700 Setup No Connection Issue
The issue may arise due to the problem in the network speed or compatibility issues. You need to maintain the high-speed internet connection by reducing the load on the router. Also, place the router close to the device for the best speed. If there is no disturbance in the network and the speed is also high, then the issue may be corresponding to the compatibility of the device. Check the system requirements for Brother QL 700 Setup, and then follow the connection process. The issue may also be due to the driver downloading from the unauthorized site. For a successful connection, uninstall the drivers and then re-install them from the authorized and official Brother printer website and complete brother printer wifi setup. If you’re still facing issues then contact brother printer support team for help.
Read